Simple Chicken and bacon rollups

This may take a little more prep than some of my other recipes, but its still very easy make. The only reason it takes a while is because you need to prepare the chicken first, however, if you use pre-cooked chicken you can literally half the preparation time and knock the entire dish together in about 15 minutes.
The combination of chicken and bacon has always been a winner and make a wonderful dish to have outside as its nice and compact and self contained in its own rollup package. You could even prep it ahead of time, chill it and have it for lunch either later in the day or somewhen in the week. It’s a very versatile recipe indeed and I think this is probably the best selling point about it.

Ingredients
| Chicken Breast | 180g |
| Smoked Bacon | 9 slices |
| Cream Cheese | 100g |
| Baby Spinach | 25g |
| Garlic Granules | 0.5 tsp |
| Salt | 0.25 tsp |
Method
- Prepare the chicken by cutting it into small cubes
- In a non-stick pan with little or no oil, cook the chicken until it is nicely browned all over.
- Remove the chicken from the pan and let it rest and cool
- Roughly chop the baby spinach and once the chicken has cooled combine the two in a mixing bowl.
- Add the cream cheese, garlic and salt and mix until the cream cheese covers the chicken.
- Lay the bacon slices out in a row and evenly distribute the chicken mixture at the fat end of each slice of bacon
- Roll the bacon up around the chicken mixture and lay them so the end is flat on the surface so they don’t come apart
- Heat your frying pan so its very hot and place each roll into the pan, join facing down. This will help to seer the bacon and hold the roll together.
- once the bacon has started to brown, turn and continue to cook until browned all around.
- Leave to cool and refrigerate or serve hot with salad and olive oil.
This may seem like quite a few steps for such a small dish, but do remember this is a very rich dish and is intended to fill you up with fat and protein and not carbohydrates. This is very much a low carb recipe and could probably be refined even further if you are really watching your macros.
I chose to make it with smoked bacon, however, it would be just a nice with normal bacon, pastrami or prosciutto ham.
Me and my family have found that three each is more than enough with a little salad. As always, put your own spin on it and let us know how you got on.
Enjoy!
#keto #paleo #lowcarb #lowcarbrecipes #lowcarblifestyle #lowcarblifestyle #quickandeasy #healthyeating #cooking #recipes
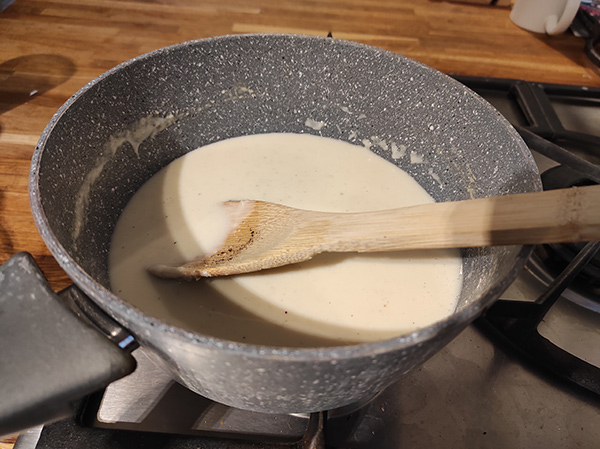
Béchamel Sauce

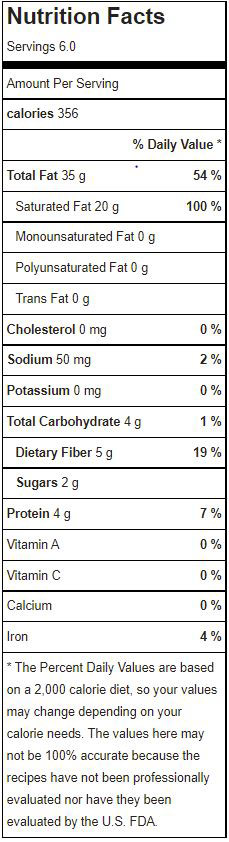
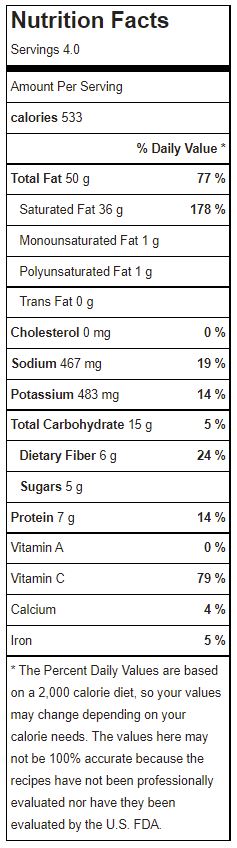
Béchamel, or White Sauce was one of those recipes I never really saw myself making. That was until I saw the nutritional data of what was in some of the most popular brands in UK supermarkets. I found that many very popular brands contained around 6 – 7g carbs per 100g portion. Now lets consider the size of the jar which is 470g, effectively five servings. This sets this jar at a whopping 30 – 40g carbs per jar. WOW, that’s just the sauce, we haven’t even started making the meal yet and already we aren’t even close to keto lol.
OK, OK, lets pull this back into perspective here, 6-7g isn’t really that much, and not everyone is full on Keto, myself included. However, I’m sure we can do better than this, right?
I recently put together a recipe for my own Béchamel Sauce after looking at some run of the mill recipes and started to play with a few alternatives I knew would help reduce the carb count. The first thing I wanted to target was the flour. As we all know, this is a massive deal for any keto or low carb diet. Secondly the milk. Although not super bad, the 600ml that the recipes I had been looking at called for would have totally blown the recipe.
I decided to use a mix of Almond and Coconut flours along with a little Xanthan Gum to help thicken things up. For the milk, there is really only one choice, yes double cream. ‘HOLD UP!’ that’s a ton of fat I hear you shouting and you would be right. this is why we are only going to use 300ml and mix it with 300ml of water, stay with me here.
Right so enough of me waffling on, lets get to the business end of things. Hears my recipe. Trust me on the nutmeg, but if its really not for you, then don’t worry, its not required..
Ingredients
| Organic Coconut Flour | 1 tbsp |
| Organic Almond Flour | 50g |
| Unsalted Butter | 50g |
| Double Cream | 300ml |
| Cold Tap Water | 300ml |
| Xanthan Gum | 1 tsp |
| Ground Nutmeg | 1/4 tsp |
| Salt & Pepper to taste |
Method
- Measure out all your ingredients ahead of time, this will make life way easier and allow you to keep you cooking area nice and clean.
- In a mixing bowl, add the Almond and Coconut flour along with the Xanthan Gum and mix it all together.
- Combine the cream and water and mix until completely combined.
- Add the butter to a medium sized pot. On a low heat allow the butter to melt. It’s important not to let the butter boil or burn as burning will add a bitter taste to your Béchamel.
- Once the butter has melted, remove the pot from the heat and add the flour mixture a quarter at a time. Mix in each quarter until completely combined. This will create a Roux, and will act as the base to you Béchamel Sauce.
- Once you have made your Roux, put the pot back over a low heat, just enough to keep the mixture loose in the pot. No more that a 1/5 if using gas.
- Slowly add the cream and water mixture while stirring continuously. It is important not to over heat the pot here or your sauce will split, reduce the temperature slightly if required, or even remove from the heat for a few seconds until you have control again.
- Once all the cream is combined with the roux, you should be left with a thick sauce. This is the time to add the Nutmeg, Salt and Pepper. I have left this till the end as I find this is a very personal thing.
- Allow to cook for about 5 min, but don’t allow it to boil, it should only be as hot as a cup of tea, so you should be just able to just about dip your pinky in without properly burning yourself.
- If your not using it strait away, put it to one side to cool and then poor into an air tight jar. It will keep for about 3 days in fridge.
Additional Ingredients
I often to use this for Lasagne so like to load it up with a good whack of Cheddar Cheese, around 100g to taste. I you want to add cheese, be sure to take the pot off the heat and add the cheese bit by bit or you will end up with a split sauce. After you add each bit (about 25g) make sure you slowly stir it in until it has completely melted, then add the next bit and repeat until all the cheese has gone.
The sauce can take more cheese or even a blue cheese if you feel adventurous, however, I wouldn’t take it past 150g personally.
Serving Suggestions
If your not overly keen on the flavour of coconut flour, fear not, neither am I. Believe me when I say, you wont taste it. This is a beautiful and warm sauce that give you a big hug when in any dish.
This is perfect for a Lasagne. Replace the pasta with sliced and oven dried Aubergine. You don’t want to completely try them out, just take some of the water out. Remember, pasta is dry when you put in in a lasagne which helps to such up a lot of liquid. Aubergine is mostly water, so this will add to whatever mixture you already have in there. Best to dry them out first.
Thanks for reading and I hope you enjoy. Please leave a comment if you have any suggestions or just want to get involved.
Vegetarian Low Carb Cauliflower Curry

This is an amazing little recipe, so low indulgent yet still within the realms of a low carb diet. This recipe also has the added bonus of being vegetarian, not something you often seen a low carb/keto menu.

I have had a love for Cauliflower for years, ever since I was a kid. There is something so refreshing about it. I remember as a kid my mum making it as part of a good roast dinner, covered in gravy (and back then ketchup too lol). For a very long time after that, Cauliflower mostly disappeared from my diet, I spose I just saw it a difficult vegetable to cook so never really used it, how wrong I was.
Since then, I have rediscovered the humble Cauliflower and have been busy reintroducing it back into my diet, enter my Cauliflower Curry. With just a few basic ingredients and a little ingenuity, it doesn’t take a long to throw together an absolutely banging curry that will rival any similar meat based curry.
So what’s the secret
What makes this so good then you may ask, well as with everything I have found, the trick is to take your time. I have made many dishes that have not turned out so well all because of this one simple fact, if you rush food, you will get rushed food.
Cooking is only as good as the passion and love you put into it. I know that cooking is not everyone’s bag, but a little time and effort will make a big difference.
But I though you said this was a quick dish?
Event though I have waffled on about care and time, there is no doubt that this is a relatively quick and easy dish. Once the ingredients are in the pot, things become more of a waiting game. The initial prep is very minimal, and can be fun if you have a flair for tossing food in the air.
Ingredients
| Cauliflower | 1 large |
| Medium Curry Powder | 4 tbsp (to taste) |
| Organic Coconut Oil | 4 tbsp |
| Medium White Onion | 1 |
| Asparagus Sticks | 4 (about 40g) |
| Erythritol | 2 tbsp |
| Double Cream | 300ml pot |
| Tap Water | 300ml |
| Kosher Salt | 1/2 tsp |
Method
- Your going to need either a large pot with a top or a wok with a top. Big enough that you can fit the entire cauliflower.
- Remove the outer leaves and core of the cauliflower and break the florets of so the are a little smaller than your first. Try not to make the bits too small or they will just disintegrate later.
- Chop the Asparagus into 1-2cm sticks, dice the onion and set aside for later.
- Add the coconut oil to the pan (you can use olive oil here if required, however, coconut oil really adds to the flavour) and heat until melted, trying not to let it smoke.
- Add half of the curry powder to the oil and mix to make a paste.
- Once mixed, add the Cauliflower florets and toss them until the majority of the surfaces are covered (get your ‘wok hey’ on here).
- After the Cauliflower is well coated, pop the lid on and steam for about 10 mins or until the Cauliflower has started to soften up (You still want them to be a little firm here, you should only feel the softness on the surface). Toss the Cauliflower regularly so it doesn’t burn. Its important not to have the heat to high hear as you only want to steam it, not cook it, that comes later. The cauliflower should have brown, slightly cooked patches, but not be fully browned all over.
- Add the double cream at a lower heat so it doesn’t split, followed by the water (use the same pot as a measure), and carefully turn the Cauliflower into the cream and water mixture
- Sprinkle the remaining Curry Powder, Salt and Erythritol over the mixture and gently mix in until everything in combines nicely.
- Pop the lid back on and cook for about 20-30 mins until the Cauliflower has cooked through. The cooking time will vary here as it all depends on how firm you like your cauliflower. I prefer it to have a little bight so 20 mins is more than enough.
- Serve with some lemon infused Konjac rice and whatever garnish you like.
Adding the Finishing Touches


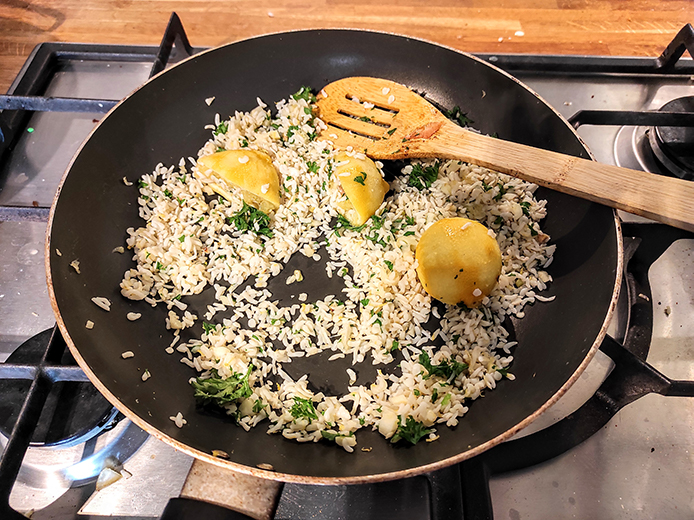
There are so many extras to add to this amazing dish. I personally like to add Lemon Infused Konjac rice. All you need to do here is to zest a good sized lemon over you Konjac rice and gently stir in. Add a little salt and pepper to taste and some freshly chopped parsley.
There we go guys, I hope you enjoy this recipe as much as I have, it really does have a wonderful depth of flavour. Tweak the curry powder to how you like it, some might like it hotter than others. Do remember though, pour your passion and love into your food and it will always replay you with interest.
Happy cooking and stay healthy!
How to make the best Bacon Keto Quiche

So its no secret the Quiche is of the best foods known to human kind. The wonderful blend of eggs and other random ingredients makes this a fully loaded flavour sensation.
If like me, you love Quiche but are put off by all that pastry, You can simple replace the carb loaded pastry with scrummy Bacon. By replacing the base of your Quiche with bacon its really easy to reduce you carb footprint while still being bale to enjoy your Quiche!
Although this is not your conventional quiche it does tick all of the boxes for texture and taste and is well worth a go. Also, it is way faster to prepare than your normal recipe and the addition of Almond Flour in the mix really helps to bulk out the recipe for a really filling meal so there is no need to eat loads to feel full
Ingredients
| Spinach | 50g |
| Garlic Granules | 1 tbsp |
| Chives | 3 tbsp |
| Crushed Red Chili Peppers | 2 tsp |
| Medium Eggs | 6 |
| Sliced White Mushroom | 35g |
| Almond Flour | 110g |
| Mozzarella Grated Cheese | 60g |
| Reduced salt back bacon | 15 Rashers |
Serving Suggestions
This recipe can be served both hot or cold. Do let it sit for 5-10 minutes after cooking though if you are going to eat it straight away as this will help it re-absorbed any fluids that may have surfaced.
If you choose to eat cold, then once cooled you can cut it into eight slices like a pizza and store in the fridge for up to a week. We like to do this and have it for breakfast after fasting. its really filling and keeps you going for ages,
Enjoy!
Enjoy!
Tuna Burgers with a Kick!

OK, OK, I know it may seem a little bit of a stretch, but yes, we can make a burger out of tuna. Infact, you can pretty much make a burger out of anything, so why not tuna.
So, what’s the story here then, where did this come from. Well I was looking around at some recipes not so long ago when I saw this tuna burger recipe. I gave it a go and it was, well, OK. This got me thinking. I like the idea and I figured I could play with it and see if I could build off of the the basics I had found. And so my fishy journey began
My first thought was, how do I like to eat tuna. This one is easy, in some bread with vinegar, mayo and cucumber. Boom, there you have it, cant go wrong, its a well known recipe right?
Well yes, unless, like me, and many reading this, you are on a low carb or keto style diet. Bread is off the menu, so what do we do I asked myself. Why not remove the bread and squish it all down with a burger press.

This is where it all started to come together. I found that combining all the recipes, barring bread and adding a little salt, pepper and MSG, made for a tasty burger, yet it was still a little flat. It needed something to give it that final kick, the elevation to lift it from something was pretty good, to something that way awesome.
OK, so what if I remove the cucumber and replace it with say… jalapeno’s, then replace the vinegar with jalapeno juice. OH YEA! now we are talking. And there we have the birth of flavor.
So here it is, my Jalapeno Tuna Burgers, This is my idea, but tweak it and play with it and make it your own. once you have the basics down then just go with it. I hope you all enjoy!
Ingredients
| Tinned Tuna in Brine | 4 |
| Medium Egg | 1 |
| Xanthan Gum | 1.5 tsp |
| Wholegrain Mustard | 3 tbsp |
| Almond Flour | 4 tbsp |
| Green Jalapenos in vinegar | 40g |
Method
- In a large mixing bowl, crack a medium sized egg and beat until the yolk and white are completely mixed.
- Drain as much brine out of the tinned tuna as possible and add the tuna to the mixing bowl and mix with the egg.
- Add the other dry ingredients in order (Xanthan gum, Mustard and almond flour) making sure you mix thoroughly between each ingredient.
- Chop the Jalapeno’s so they are the size of a small pea and add to the rest of the mixture.
- Finally Add about a tablespoon of the Jalapeno Juice. This will give the whole mixture a lovely kick. Add more if you like it a little more spicy, but try not to make the mixture to wet. You are looking for the wetness as a defrosted burger so if things get a little too wet, just add a bit more almond flour to balance things out.
- Equally divide the mixture into four and with a burger press, firmly press out you burgers. (hint, if you run out of wax discs, just use baking parchment).
- Put you pressed out burgers in the freezer for at least 30 minutes as this will make them easier to handle when it comes to cook.
That’s it. This s a really easy and fun recipe to do, also the kids will love making them as they can use the burger press. Cook on a griddle for 5-10 mins. You will only need to brush the griddle with olive oil just to ensure they don’t stick to the pan.
Serving Suggestions
I love to serve this up with a lovely fresh salad with cucumber and a little balsamic vinegar. Alternatively you could make up a little fathead bread and make a full burger out of them and add a little cheese and hot sauce.
Enjoy!
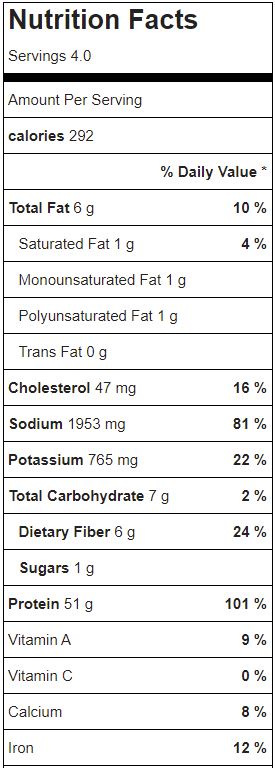
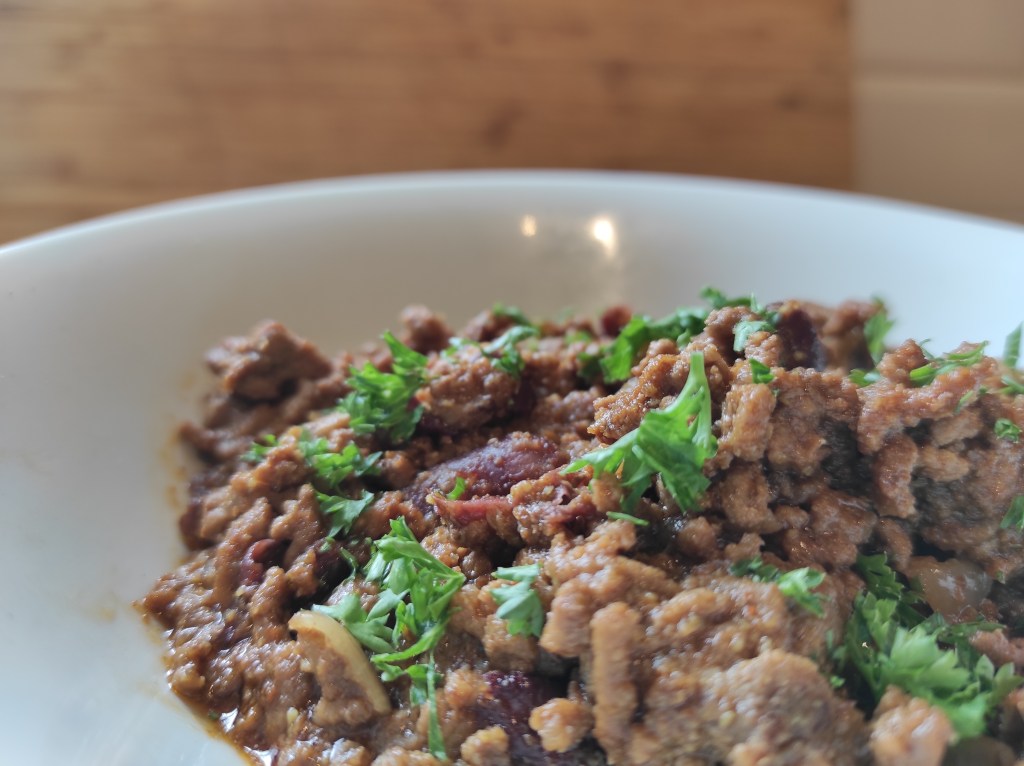
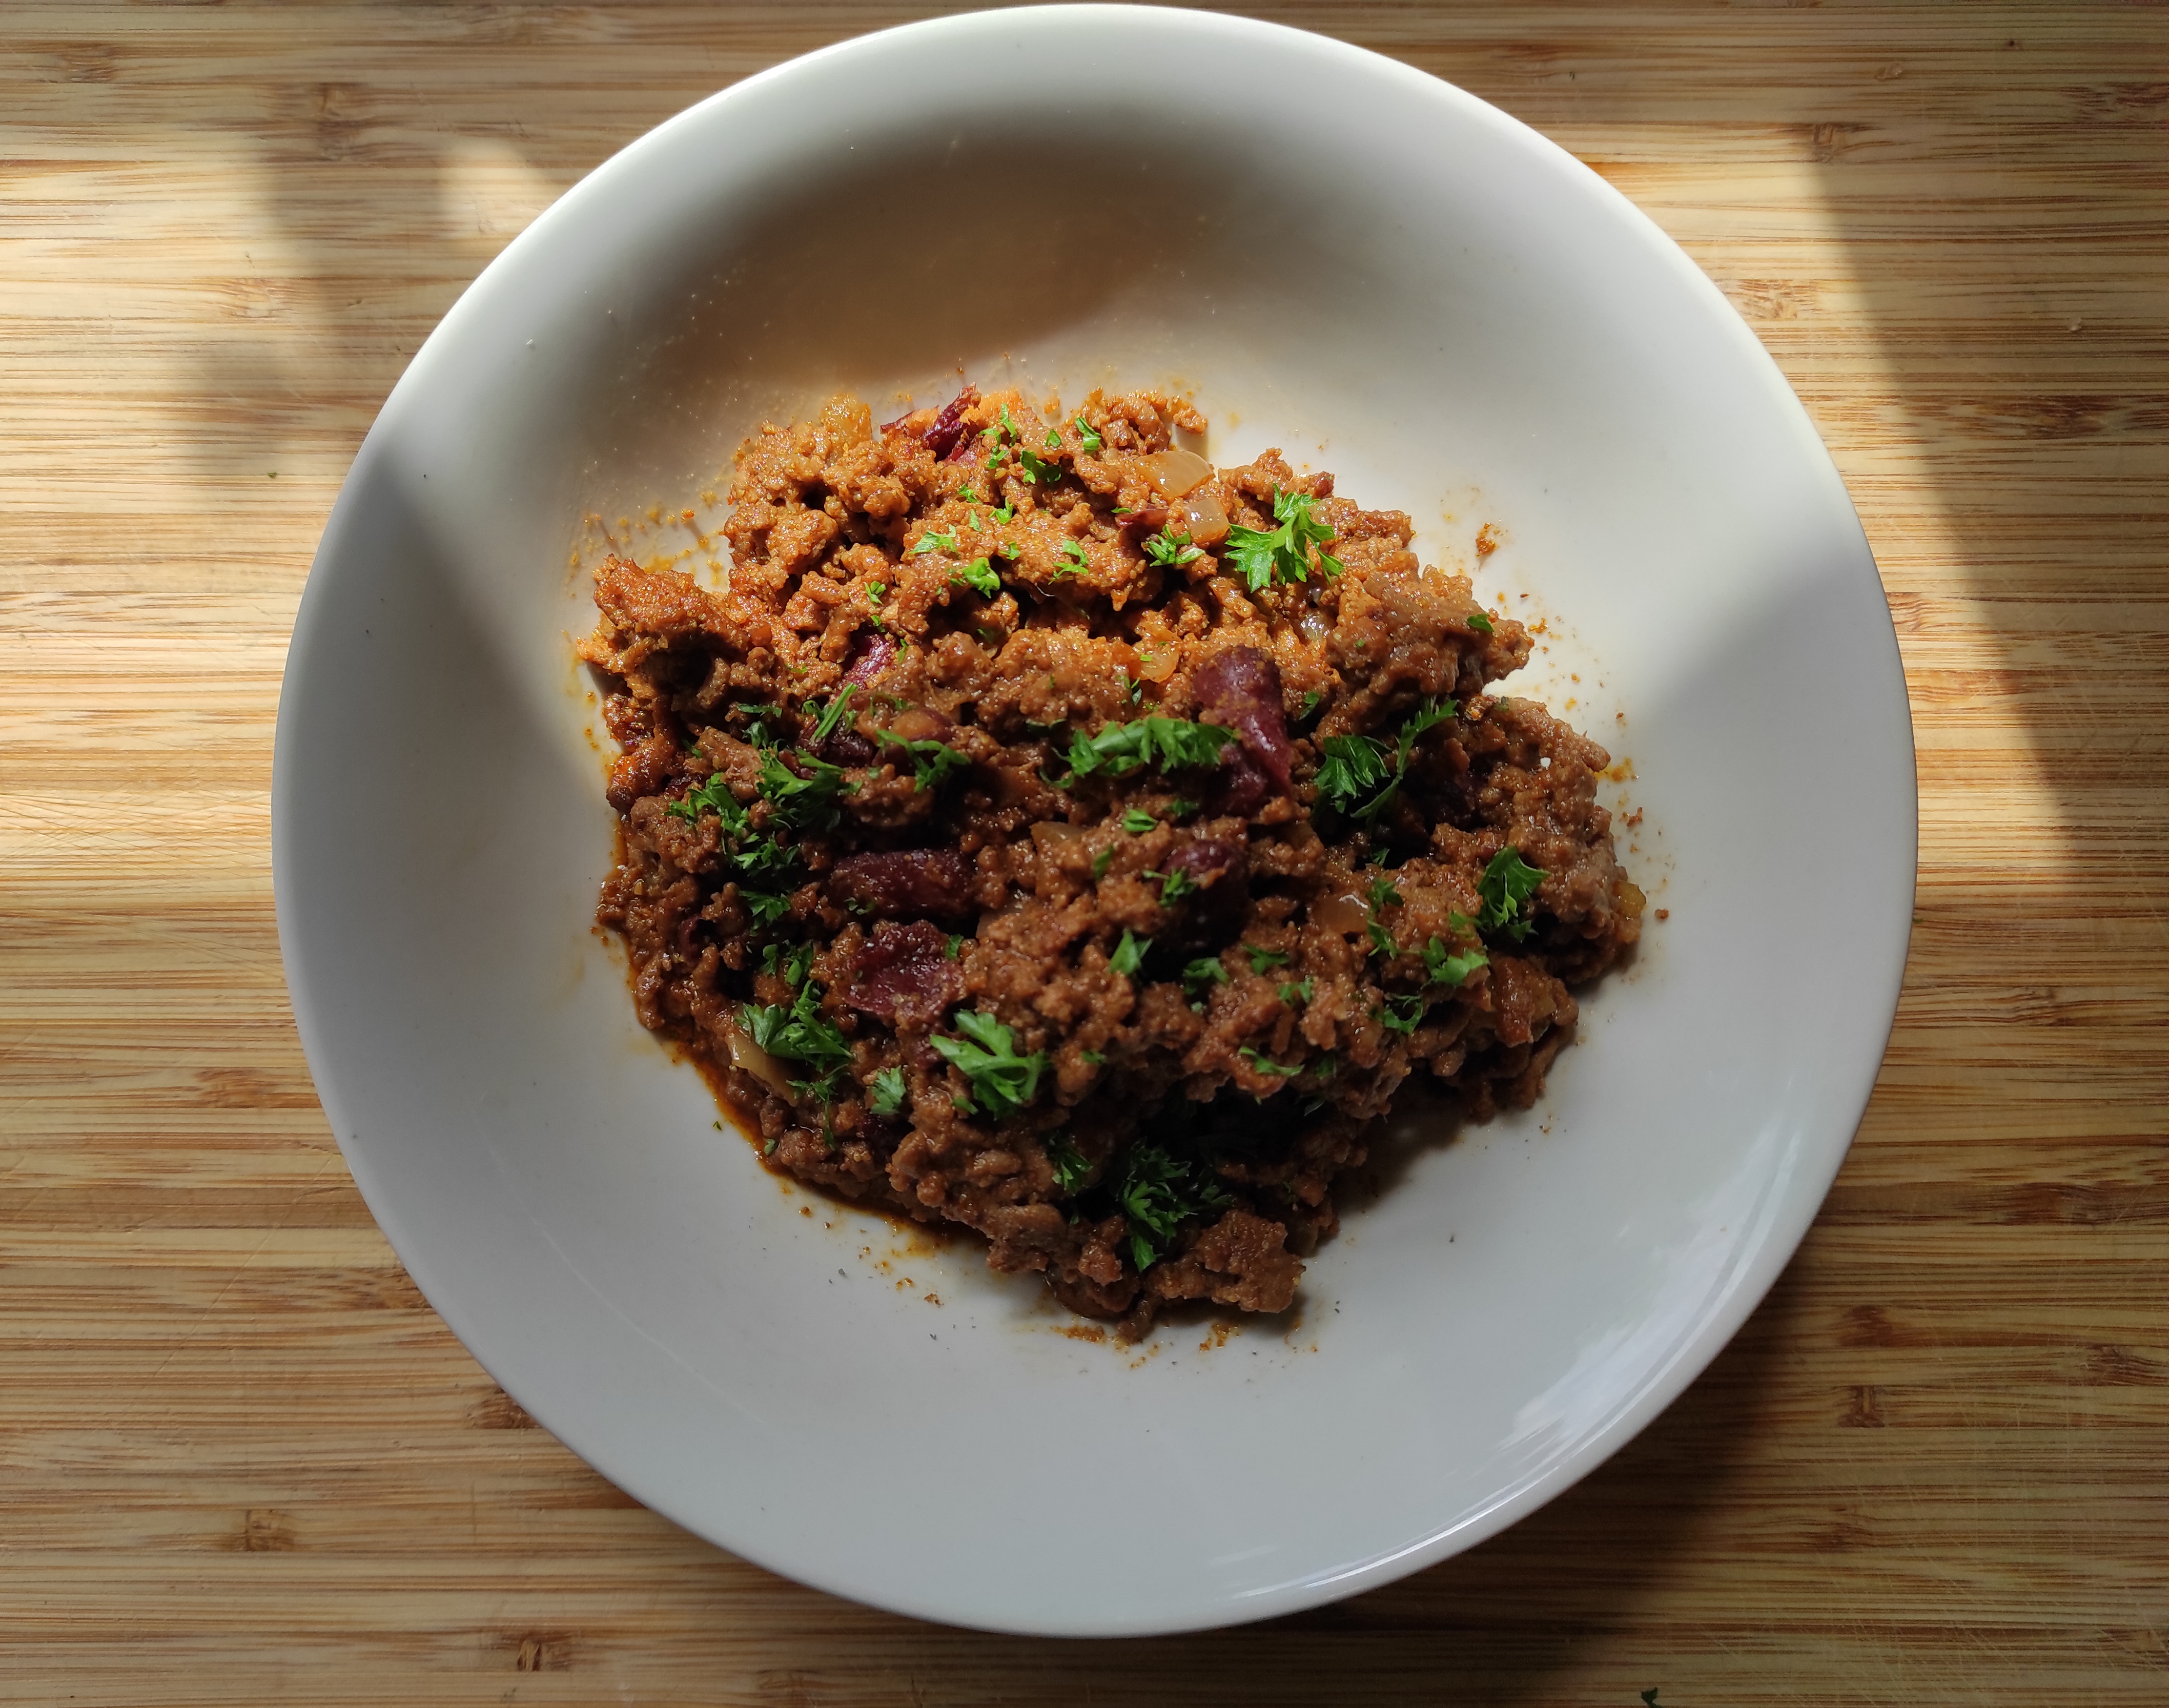
Keep it Simple Chilli

I have made and eaten a lot of chilli in my life. I have played with numerous combinations and all kinds of random ingredients from coffee to chocolate and even cinnamon, however, everytime I make it I come to the same conclusion, a good chilli is not about how many ingredients you can stuff into a pot, instead it’s how you combine those ingredients and the attention you give it.
Many people, including myself, have all made the same mistake by adding everything they can find into the pot, throwing in insane amounts of spices and then cooking as hot and as quickly as possible. Now in some cases this is a valid approach. Maybe there are time restraints or you decide to go a little nuts by throwing an avocado in just to see what happens (experimentation in the godfather of all creation after all), it’s all good. But if you want to create something wonderful, deep and truly spectacular, all you need do is keep it simple and take your time.
Ingredients
| 20% Minced Beef | 500g |
| Medium White Onion | 1 |
| Passata | 75g |
| Tinned Kidney Beans (with juice) | 200g |
| Garlic Cloves | 3-4 |
| Hot Chilli Powder | 2 tbsp |
| Cumin | 2 tbsp |
| Tap Water | 1/2 cup |
| Salt & Pepper to taste |
Method
- Add the mince to a large non-stick pot with no oil. the fat in the beef will stop it from sticking to the pan.
- While the beef is browning, peel and dice the onion, checking back on the beef now and again to give it a stir.
- Once the beef is browned, add the chopped onion and cook for a few mins.
- Add salt and pepper to the beef, but not too much, you can always top it up at the end.
- Add the Cumin and Chilli powder and cook for a few more minutes while stirring to mix all the spices in to cover all the meat
- Pour in half the can on kidney beans, the the juice, this will act as a thickener.
- Finally pour in the water and mix in.
- Reduce the heat right down and pop a lid on the chilli. You want to leave it cooking until its reduced down quite a lot, but not so much that the beef is dry, take a look at the images above. I would say between 15-25 mins. I often turn it off after about ten minutes and let it just sit in its juices. This helps to develop the flavour even further and tenderise the meat. After sitting for 10-30 minutes, don’t let it go cold, pop it back on for another 10 mins and serve.
#keto #lowcarb #cooking #recipe #lowcarblifestyle #ketolifestyle #chili #quickandeasy
Sugar Free Candied Nuts

Candied Nuts are one of my all-time favorite low carb, sugar free snacks. These little beauties make a great addition to loads of great dishes, or just to scoff on their own.
There are loads of recipes out there for this, so what makes mine any different, well, its in the title, sugar free. Now you may ask how this is possible as the act of candying inherently requires sugar, and yes, you would be correct. However, due to modern nutritional techno boffins we are able to cheat a little here.
Enter in Erythritol
This stuff is a game changer, I’m sure I’m not the first or the last to spout the advantages of this stuff so I’ll keep it short. Erythritol is an alcohol sugar, this doesn’t mean your gunna get drunk, or that it contains any alcohol, its just derived from alcohol. It also ha the added bonus of being almost carb free… YES CARB FREE! I had to see it to believe it myself, but its true. Its a little less sweet that normal sugar at only 70% sweetness, however, it does caramelize like normal sugar does which is why it works in this recipe (I bet you were wondering when I would bring this back to nuts 😄)
The recipe is super simple, you can mix it up and add what you like but the basics will always be similar to this. So have a go and see what you come up with. Feel free to comment and dont forget to subscibe for more great recipes!
Enjoy!
Ingredients
- 1 Egg white
- 1/4 Cup of Erythritol
- 1 tbsp Cinnamon
- Mixed nuts of your choice

Method
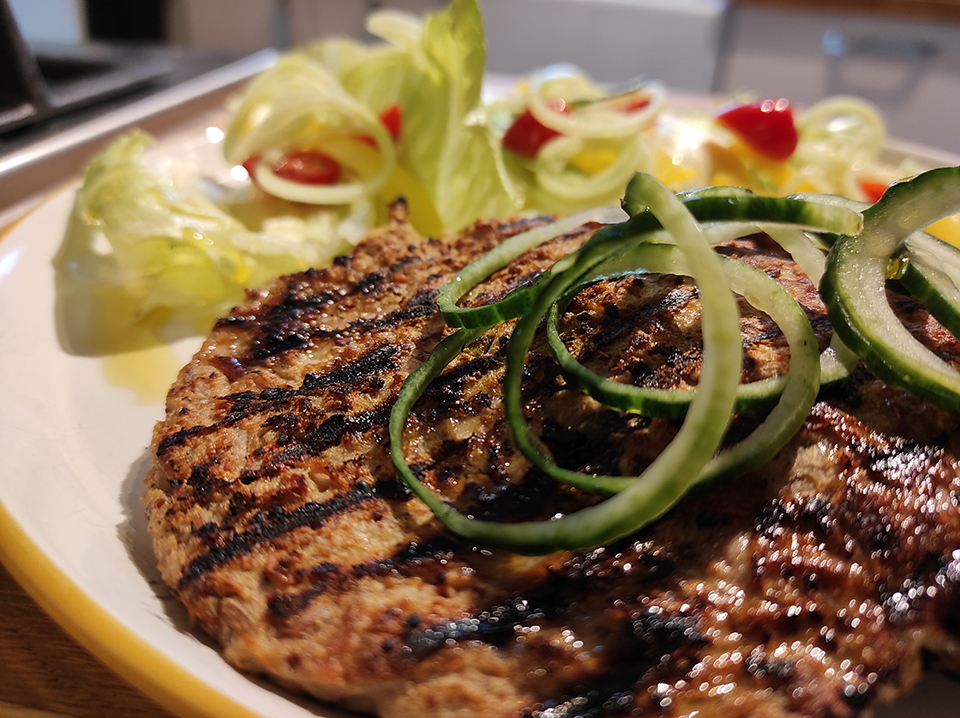
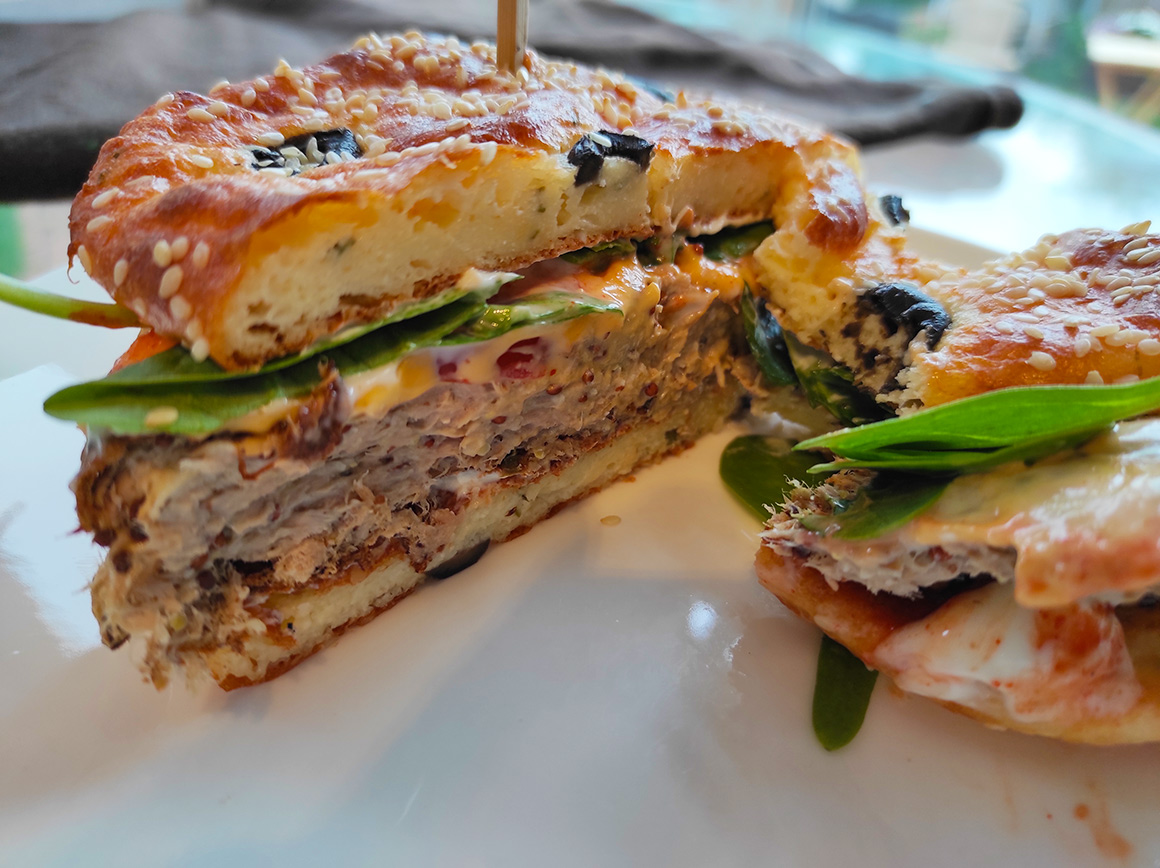
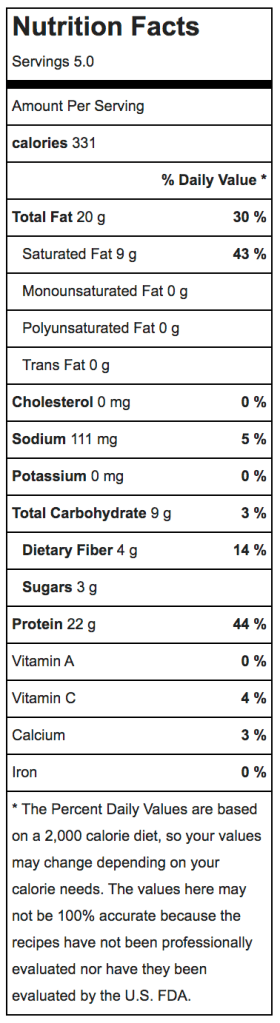
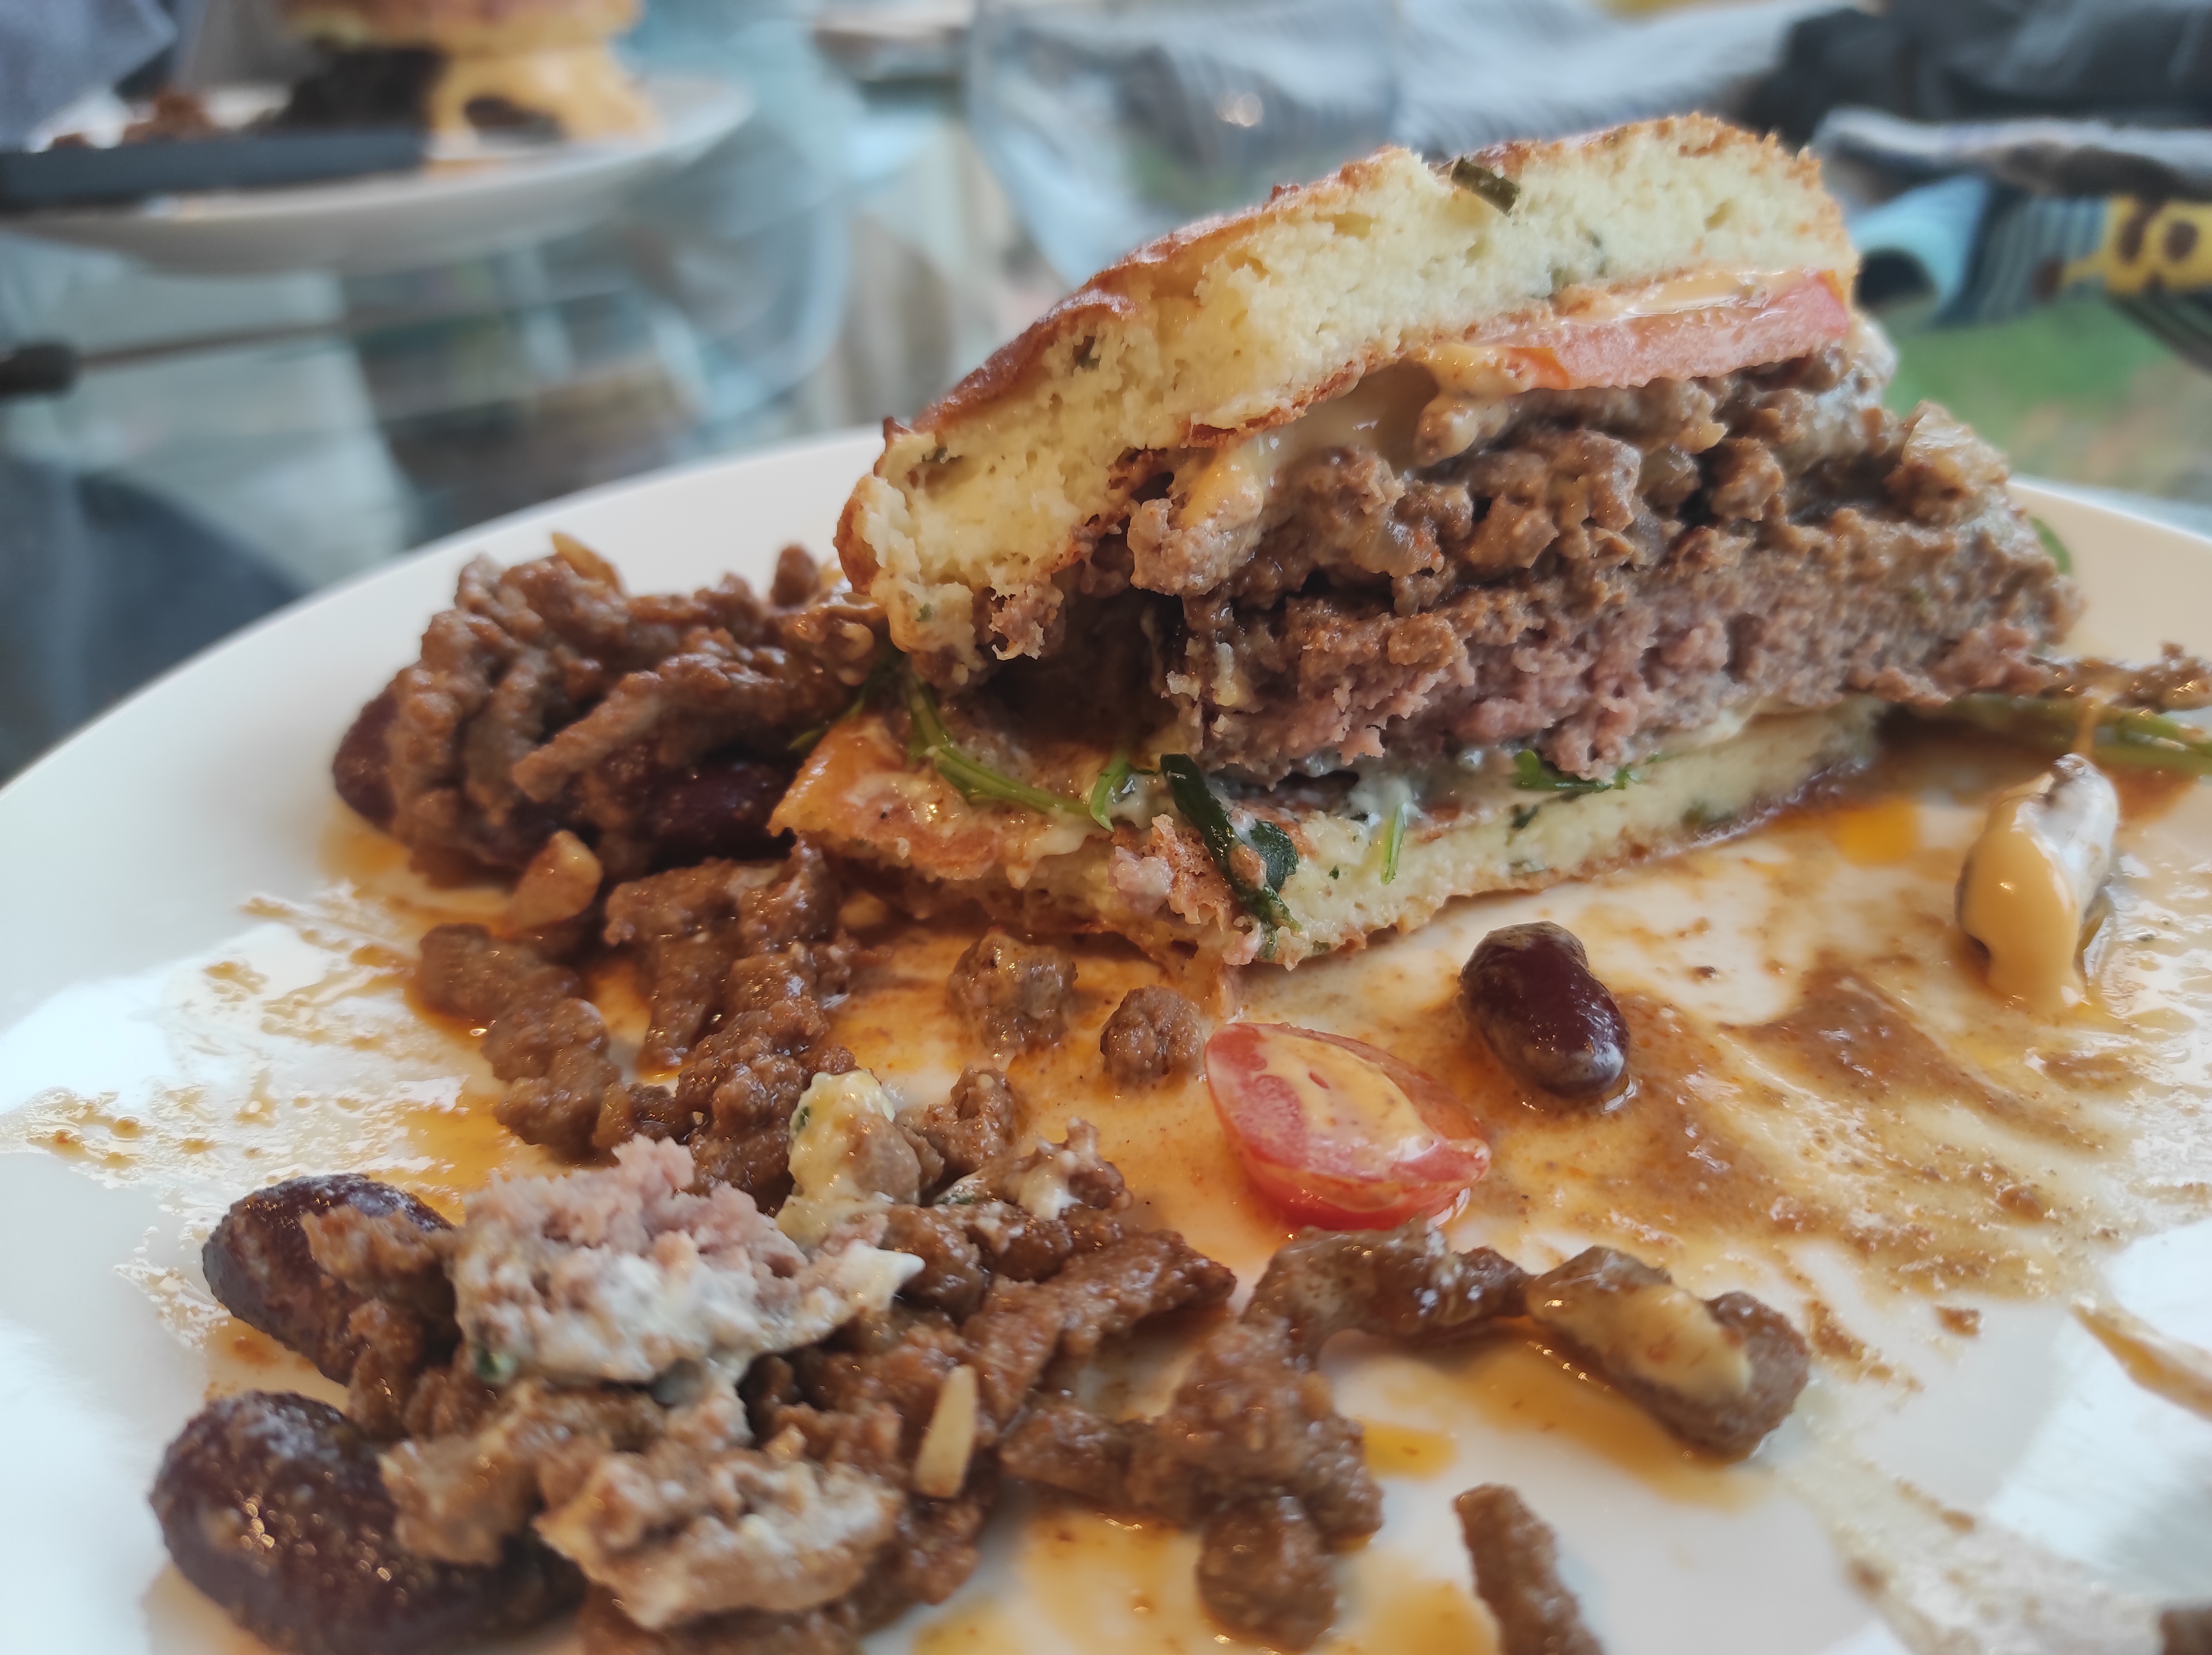
Rosemary & Garlic Fathead Burger Baps

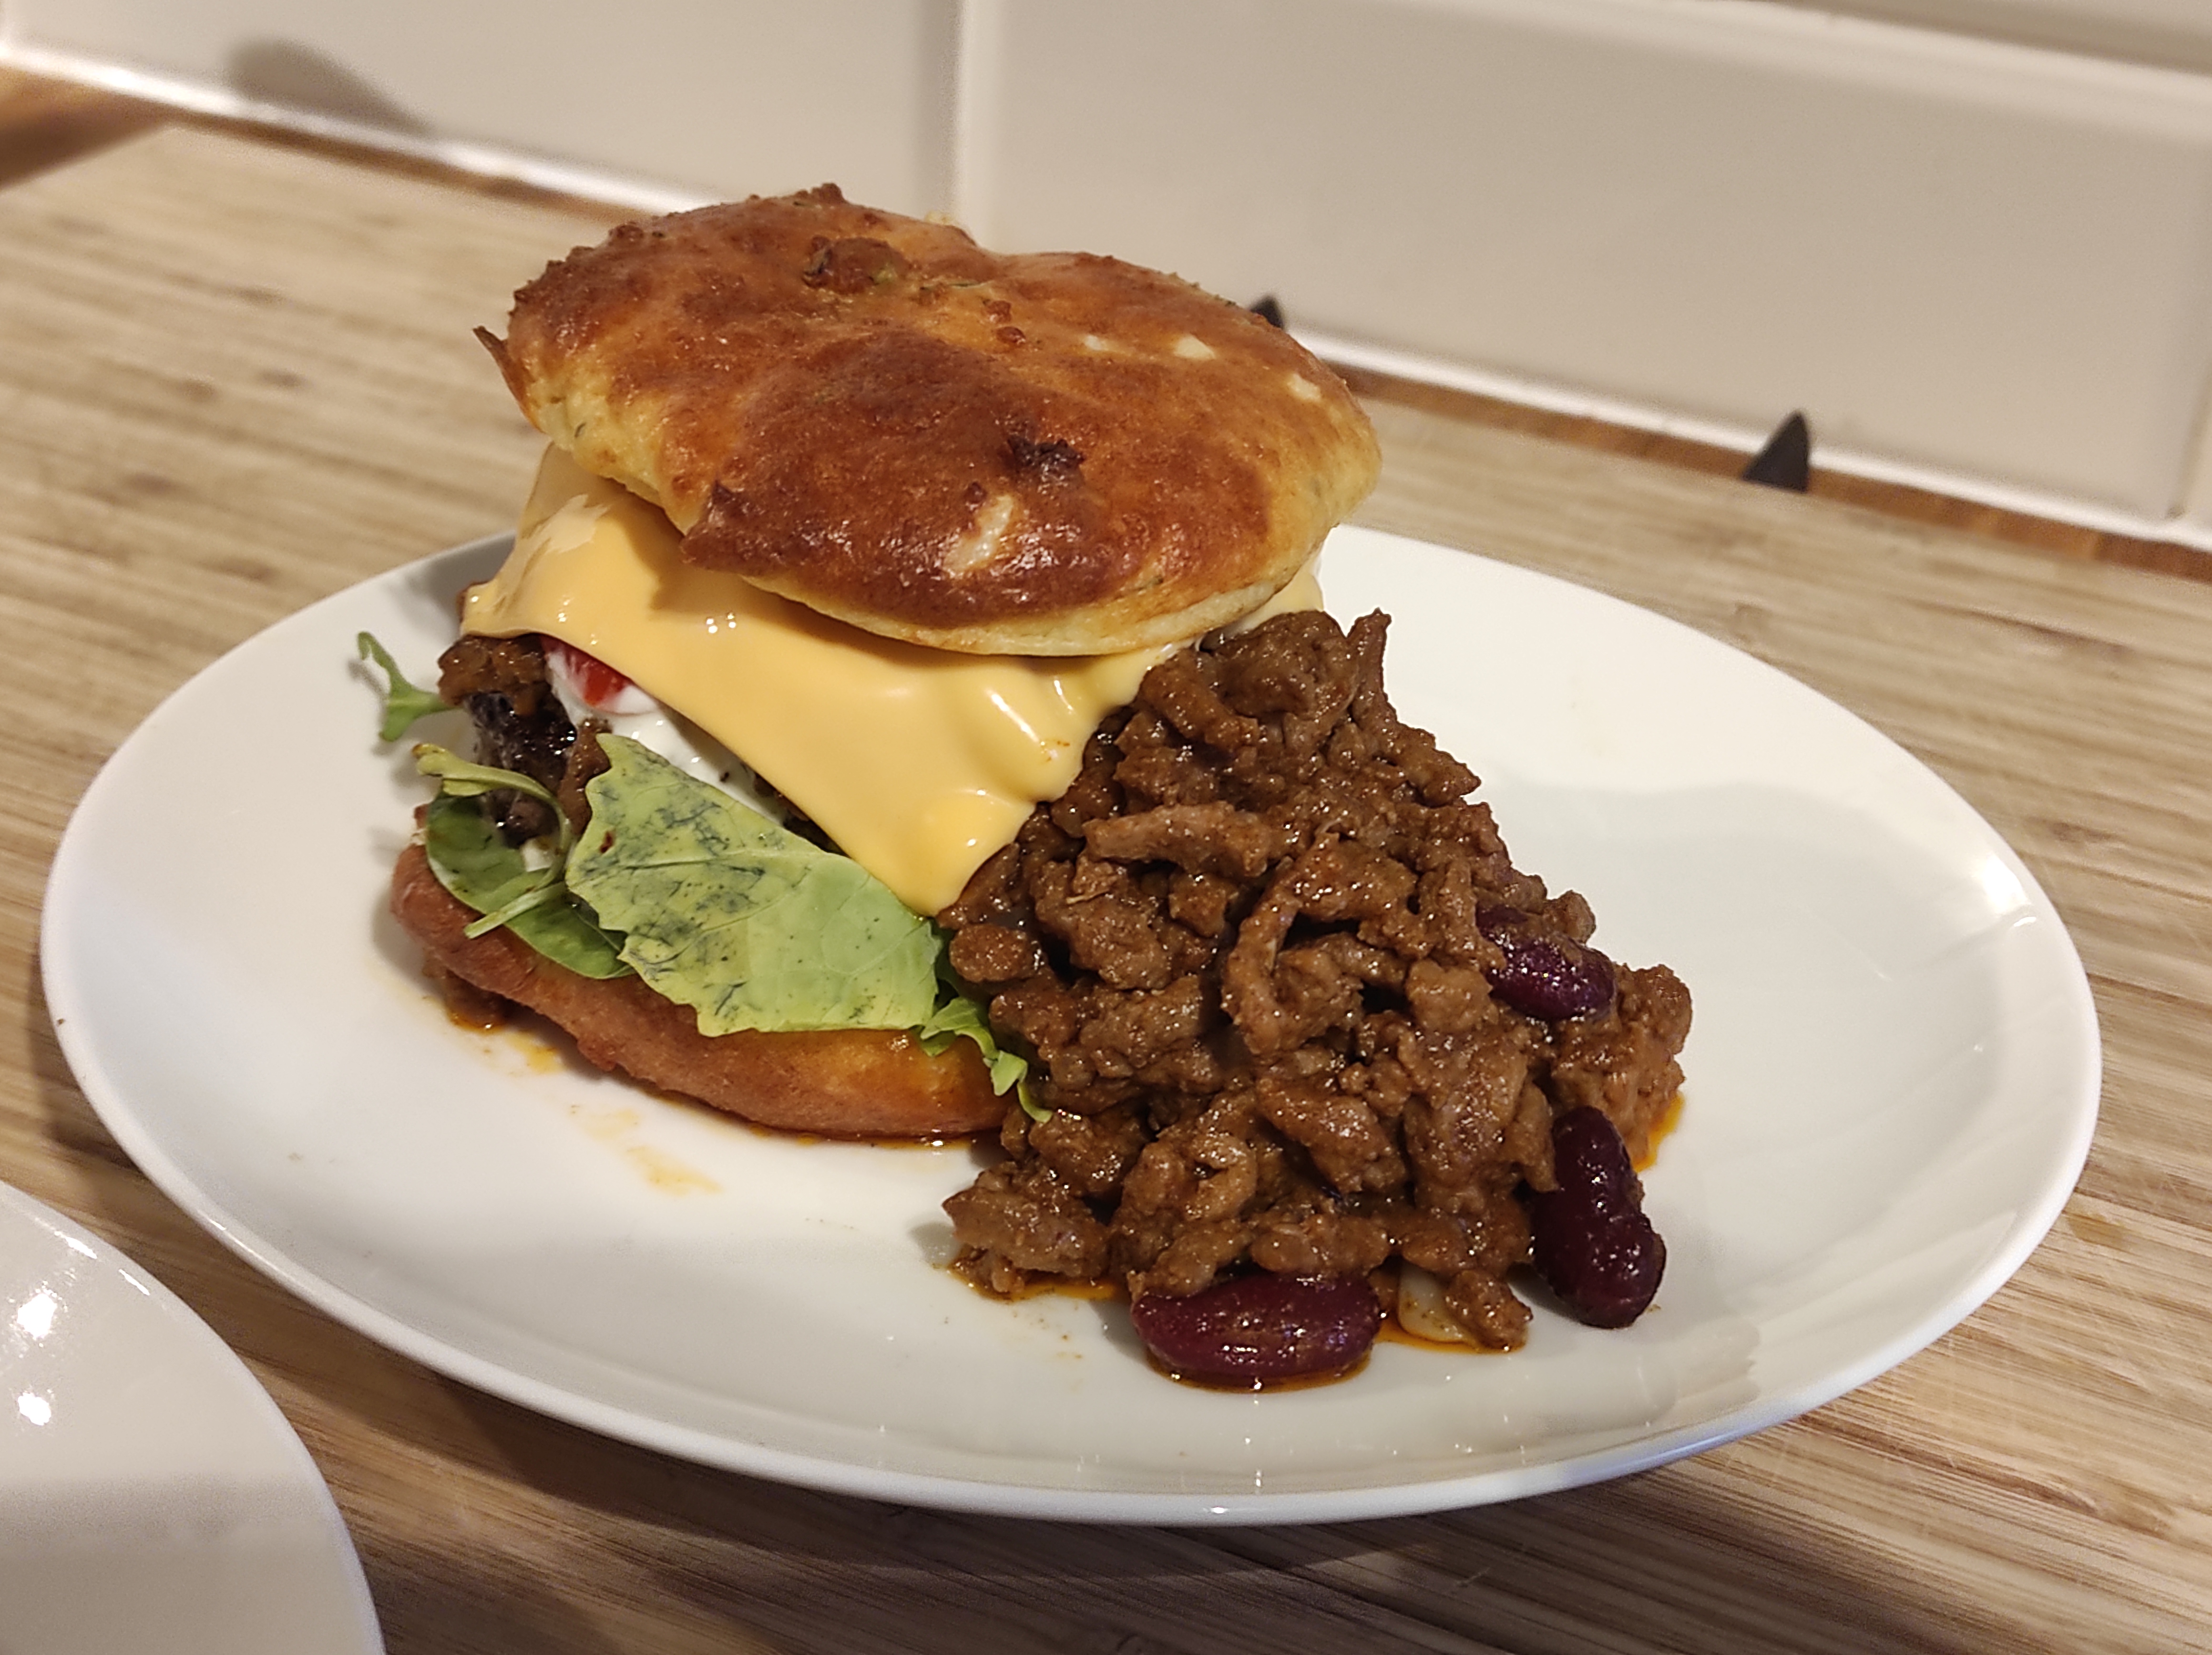
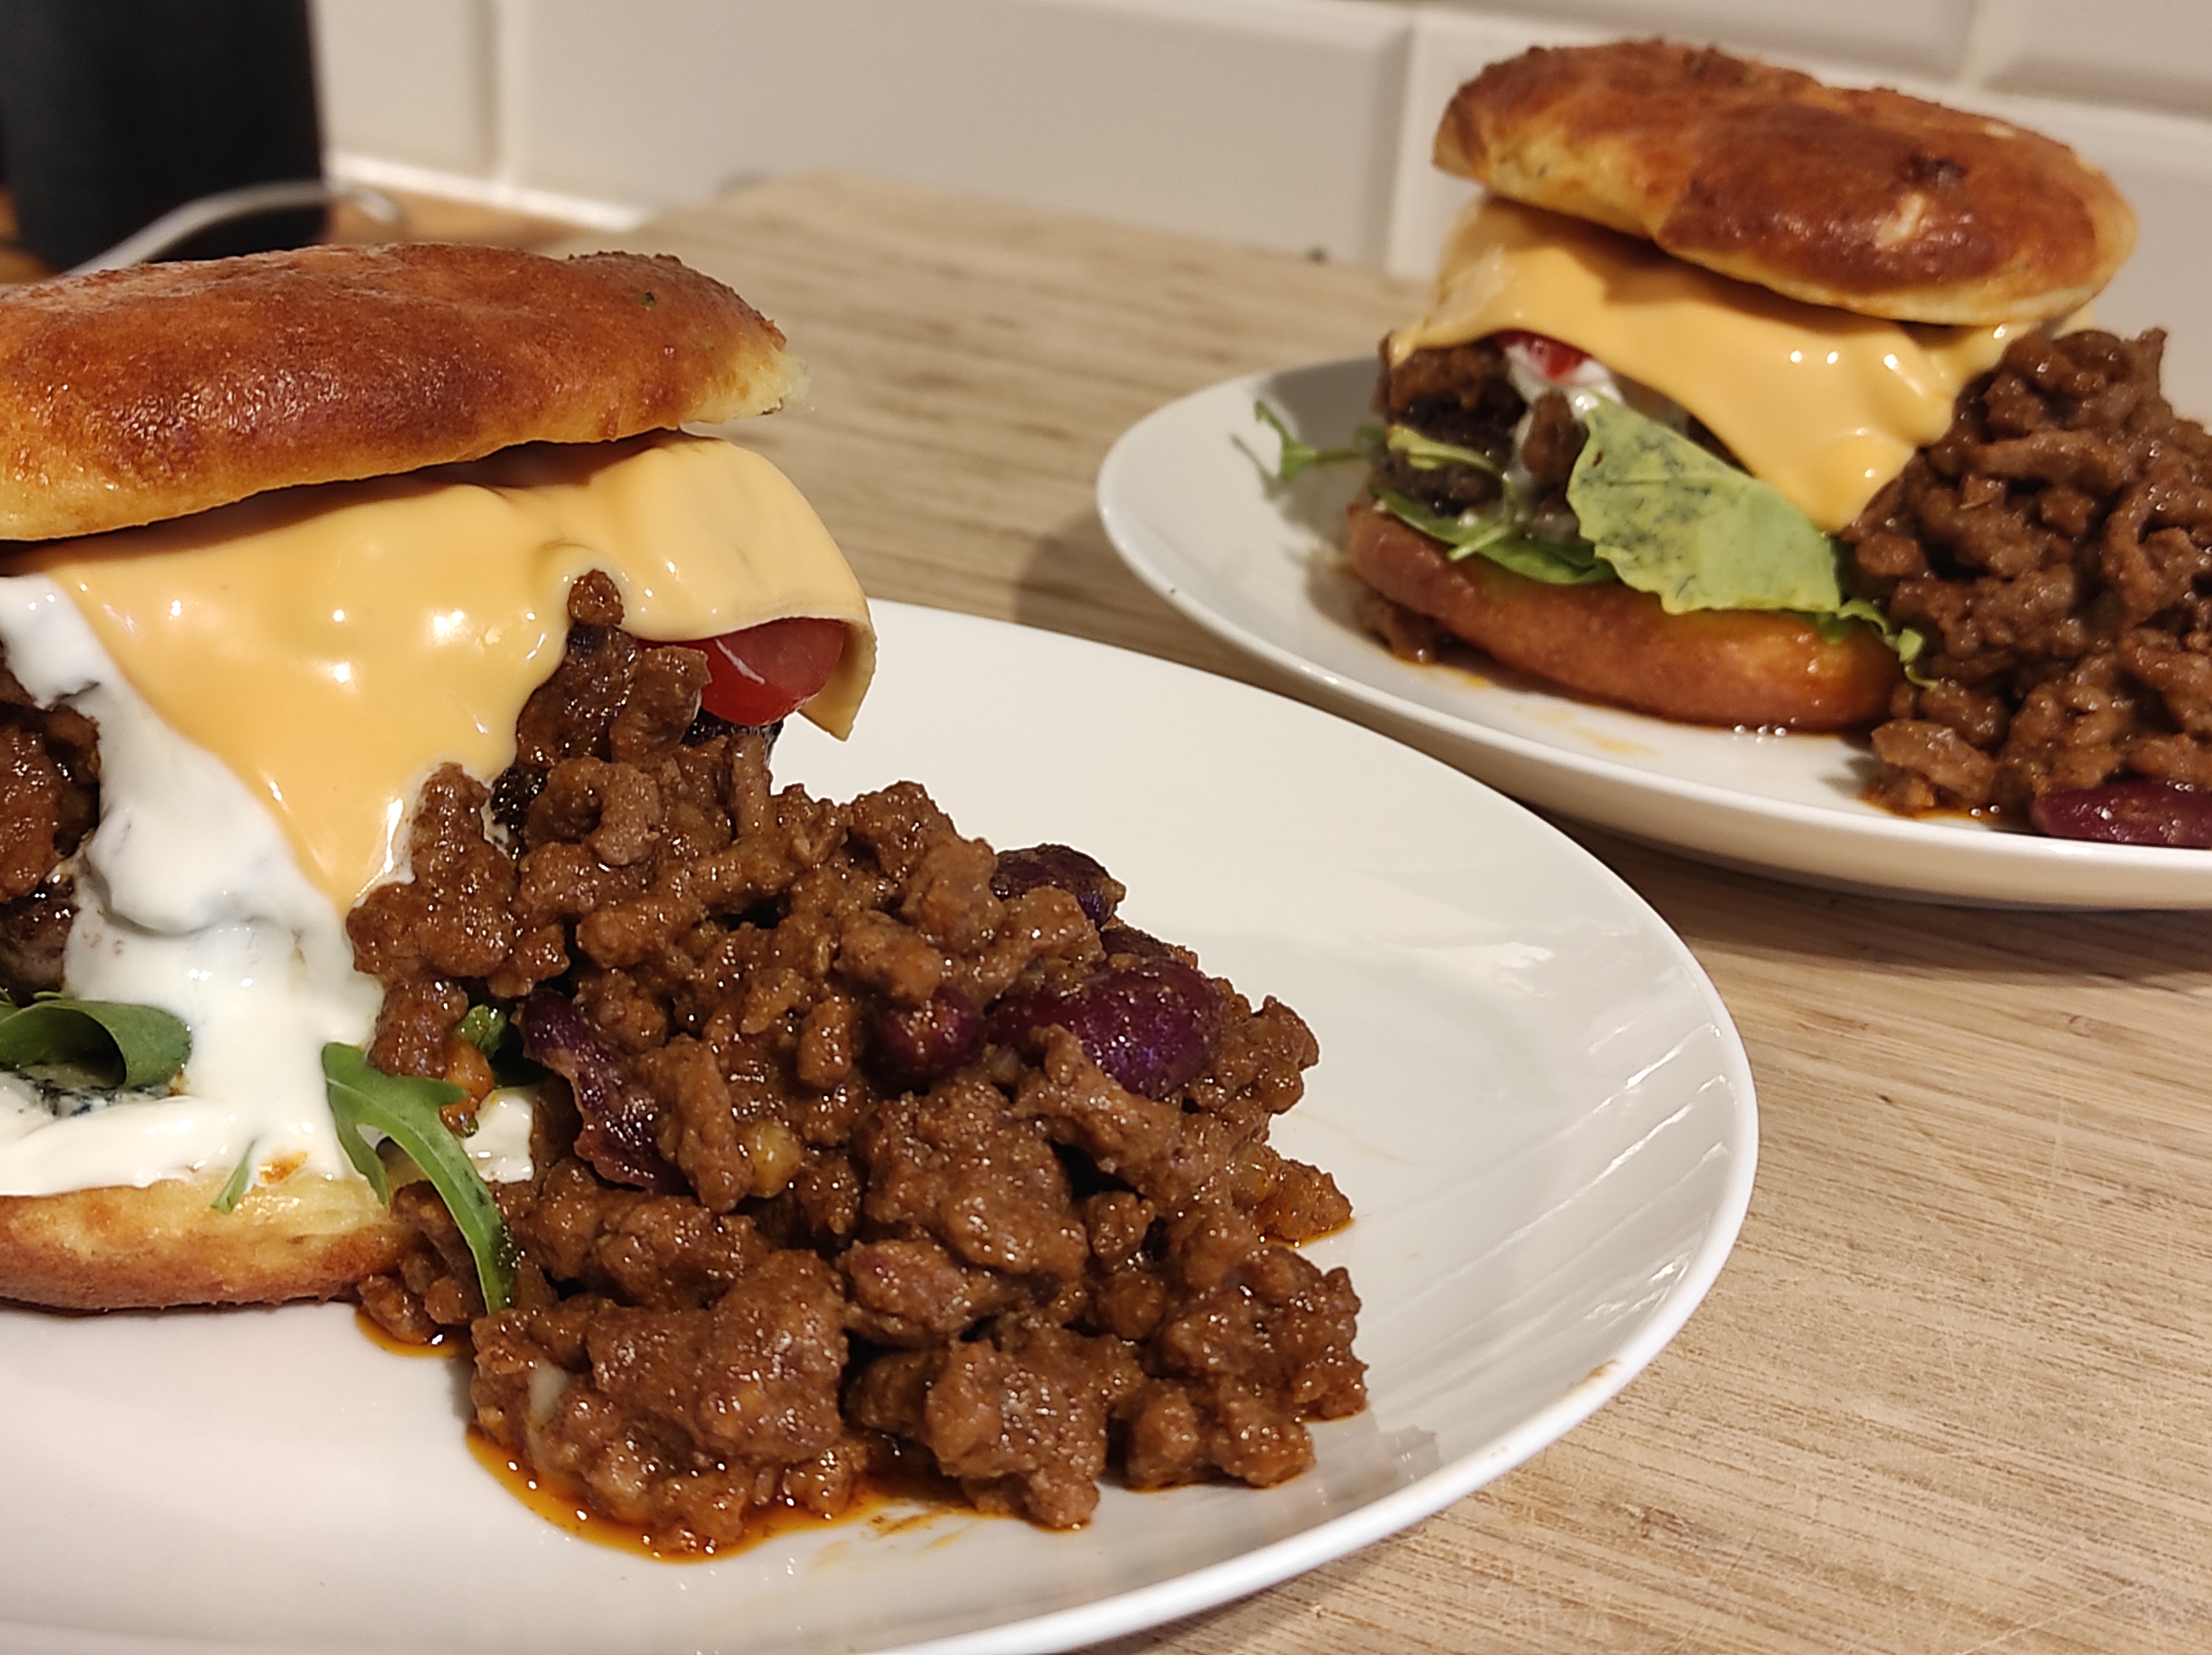
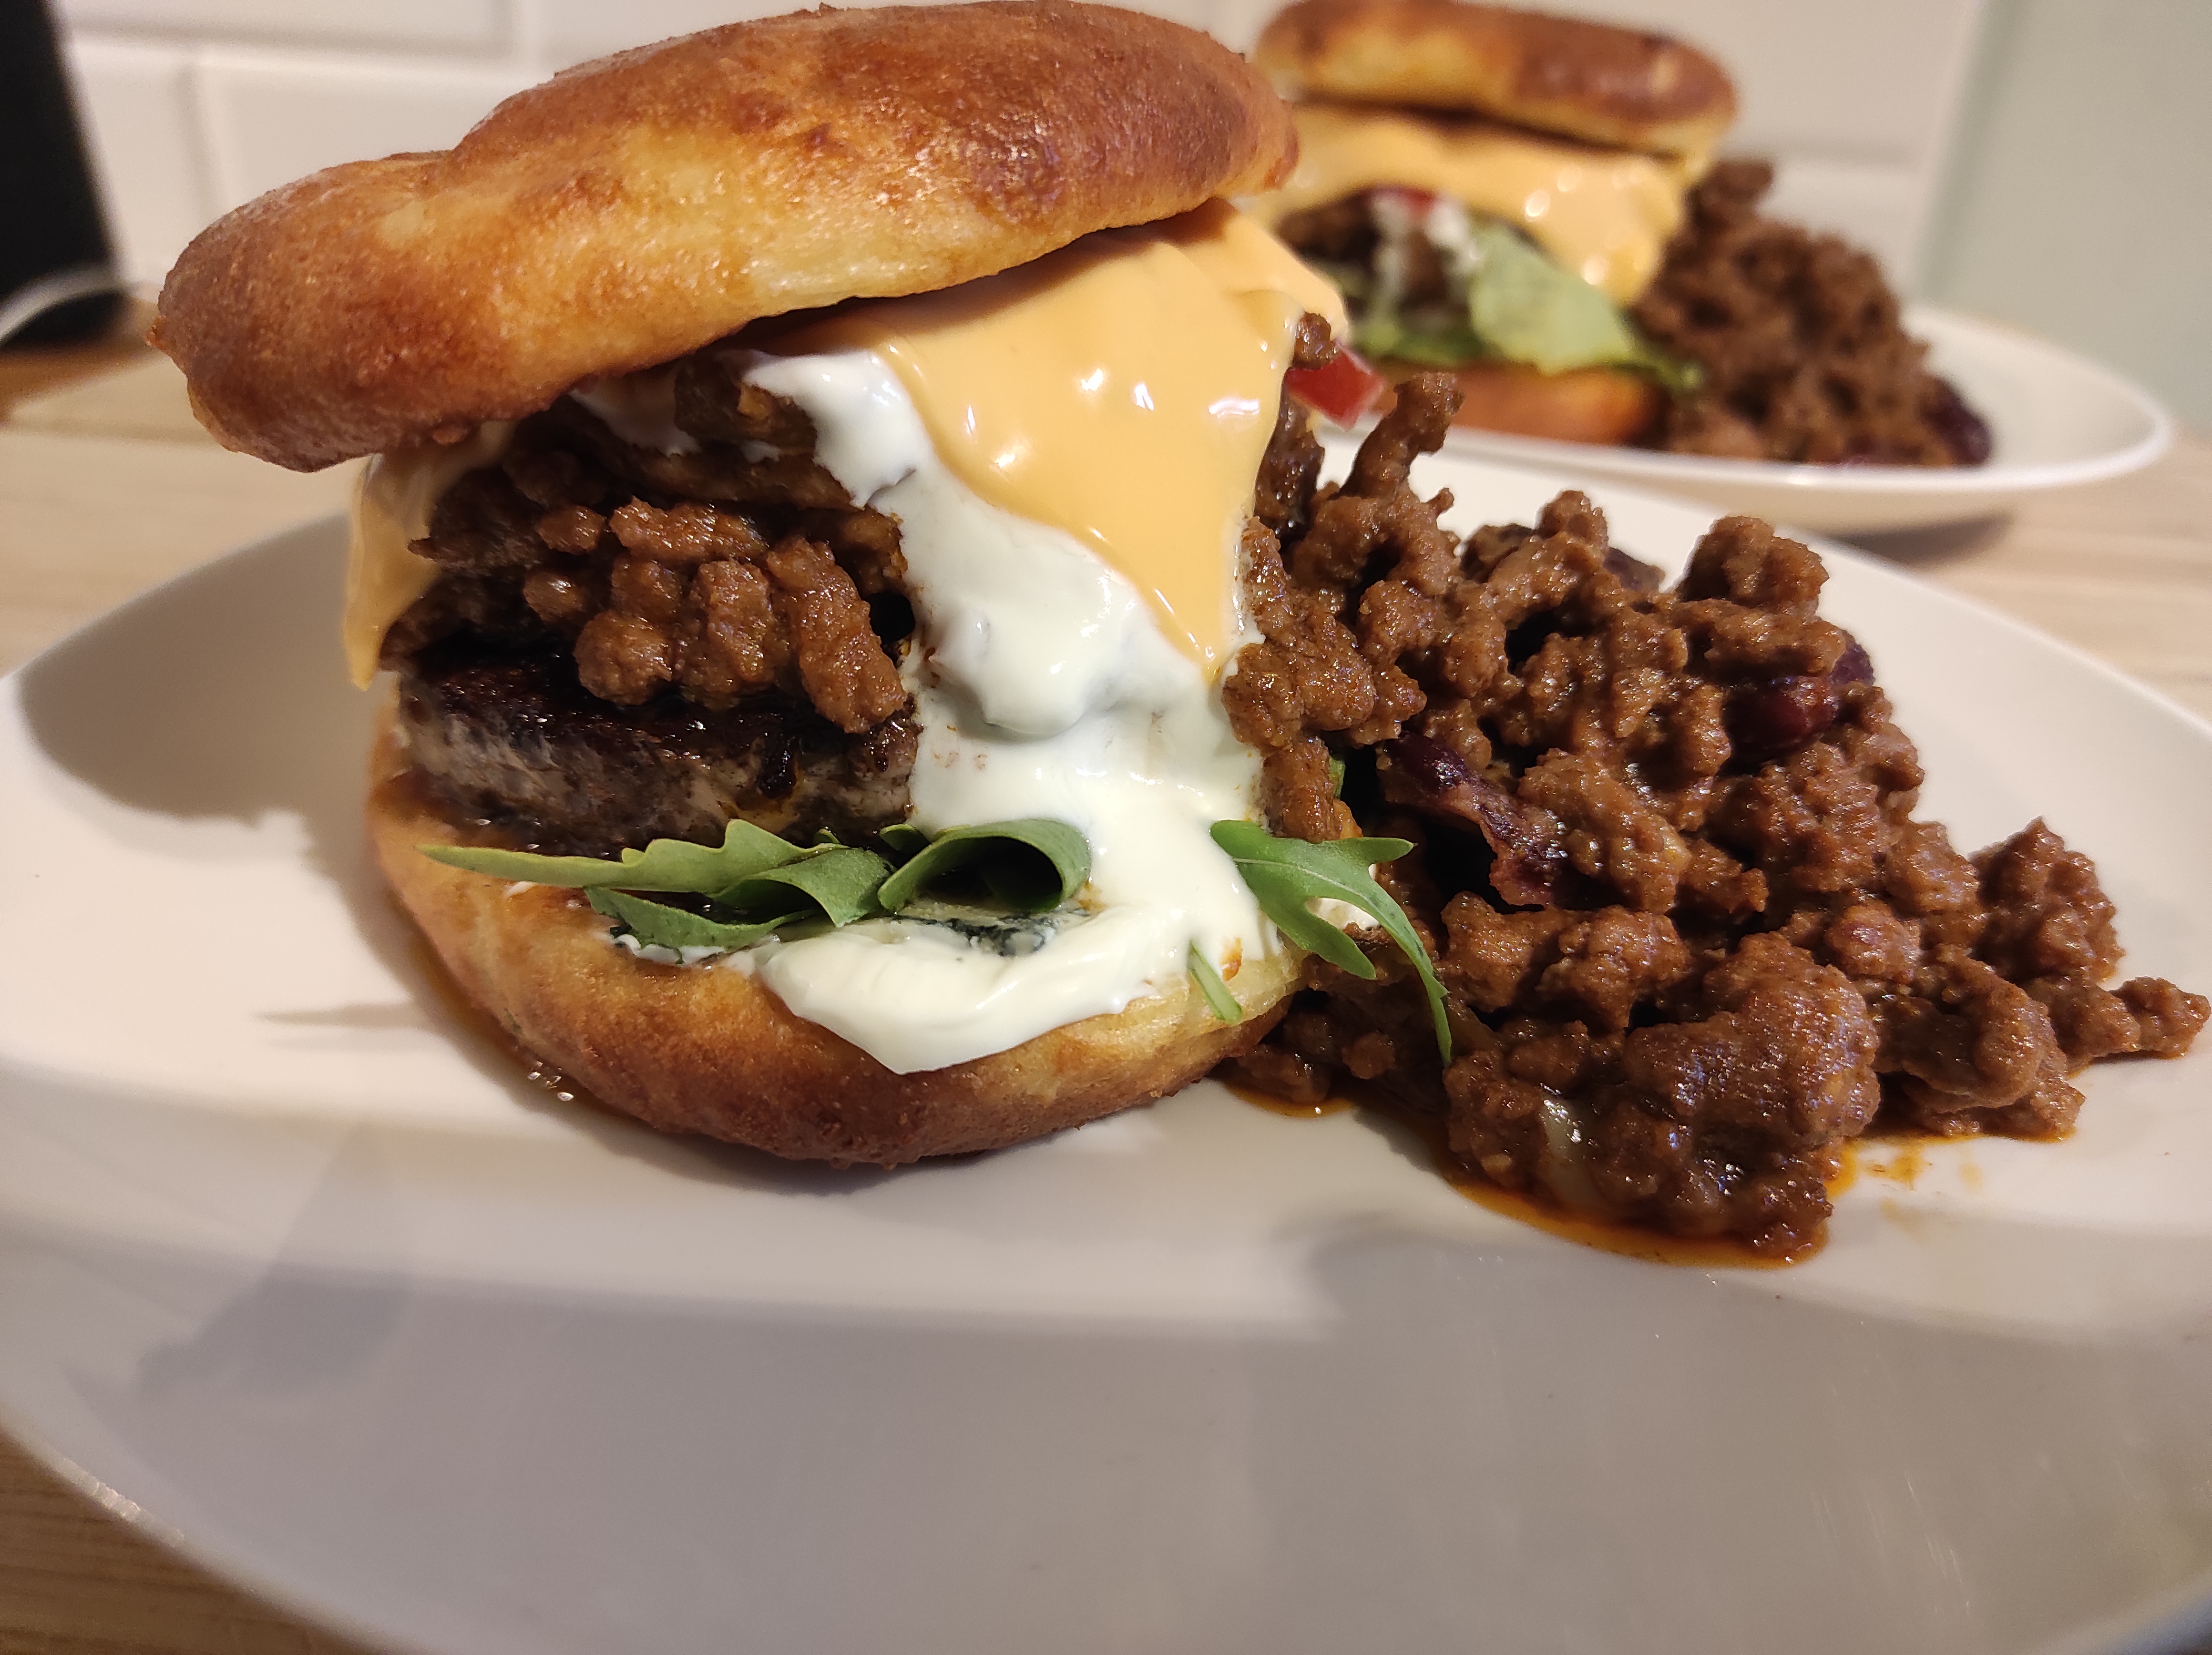
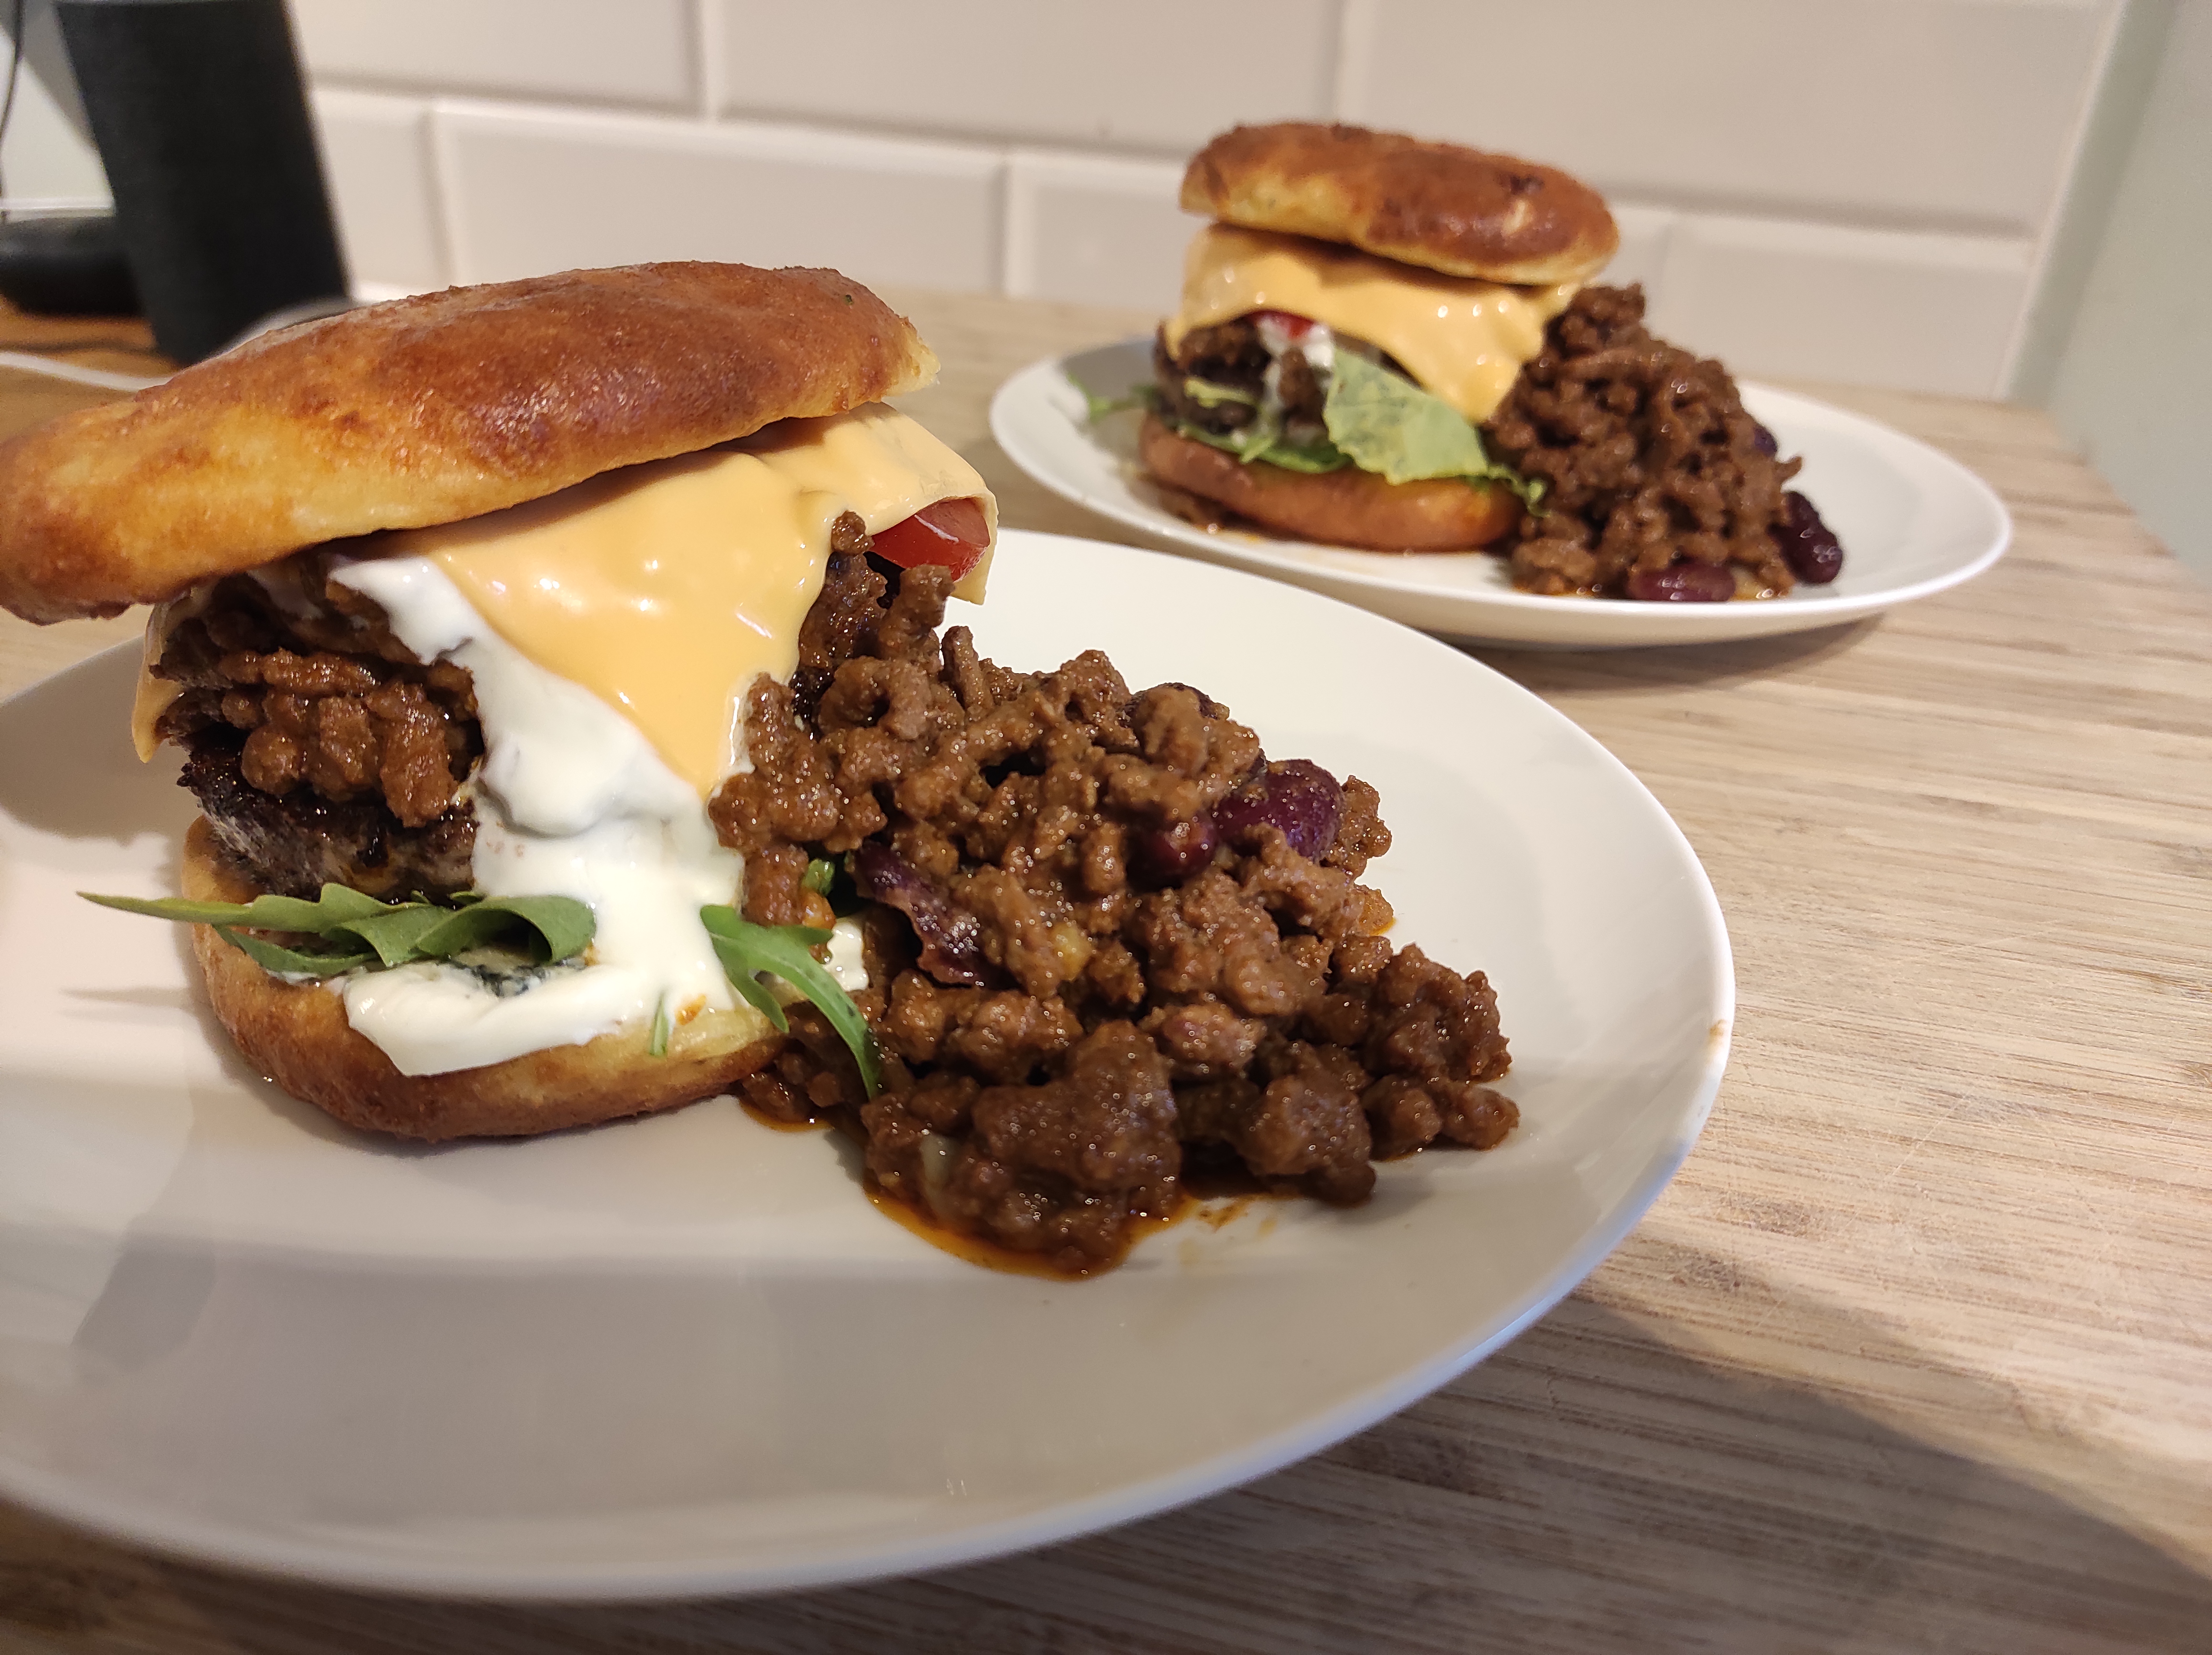
So, this is the first post of a series of posts on how to create an amazing fully stacked Chilli Beef Burger without blowing your carbs into the stratosphere. In this post I will show you how to make some amazing rosemary and garlic burger baps that are going to compliment your burger, chilli combo just perfectly.
Firstly, lets take a look at what you can expect at the end of the series. This beauty ended up at about 16g of carbs, which I know is not really Keto, but it definitely lands in the low carb category. Also do remember, its not the Fathead Bread that pushes this over the top, its the Chilli. I have done this before without the chilli and it comes in at about 7-9g carbs which most definitely puts this in the magical Keto range so don’t be afraid to experiment with your own ingredients to achieve the carb range you are looking for.
So, this recipe was born from my love of a BBQ, even though the recipe I will be sharing with you will not be done on a BBQ, it can easily be adapted. In fact, Fathead Bread can be used for many things such as a pizza base or thins to replace bread or even pie toppers. Check out a few recipes I have created here.
Being such a versatile recipe, it is very easy to put your own spin on it. Almond flour is the perfect flour replacement for Keto and low carb as it is relatively low in carbs and high in fat.
Alternative Ingredients
There are alternatives to Almond Flour that can be used, look for anything that has a 1-1 ratio with normal flour and your onto a winner. If you are interested in staying on the Low Carb Keto wagon, then a good alternative is Coconut Flour. Keep in mind if you are going to take this route then you will need to adjust the recipe accordingly as coconut flour is more absorbent than most flours, so you will require more wet ingredients, however, fear not, this I can help you with. Checkout my coconut flour pizza base recipe here.
Although this is a pizza base recipe, the same principal applies, just don’t roll it out, split the mix into four and pop it on a baking tray until done. When using coconut flour, there is a bit of an after taste, but this can easily be masked with aromatic herbs such as rosemary, thyme or basil or with additional ingredients such as olives or chilli’s.
Ingredients
| Fresh Garlic | 2 medium cloves |
| Medium Egg | 1 |
| Baking Powder | 1 tsp |
| Fresh Rosemary | 3/4 tbsp (adjust to taste) |
| Cream Cheese | 2 tbsp |
| Almond Flour | 1/3 cup (approx 50g) |
| Grated Mozzarella Cheese | 160g |
| Cider Vinegar | 1 tsp |
| Himalayan Salt | 1/2 tsp |
Method
- Prepare and measure out all the ingredients before hand, this make life a little easier and ensures that your workspace will remain nice and tidy.
- Set the over to 170-180c fan.
- Add the mozzarella and cream cheese to a large microwavable bowl and microwave for about 90 seconds until melted and mix well.
- Add the other dry ingredients including the rosemary and garlic to the bowl followed by the egg. Be sure to add the egg last as we don’t want the hot cheese to start cooking the egg.
- Mix well to form a dough, the dough will be very springy, but don’t worry, this is due to the mozzarella.
- Line a large oven tray with baking parchment and add four equal blobs of the mixture. Ensure there is a good bit of space between each blob as they will spread slightly, I tend to place one at each corner 2-3cm from the edge.
- Bake for between 8-12 minutes depending on your oven and how well you want them done. The should rise slightly and become smooth on the top.
Wrapping Up
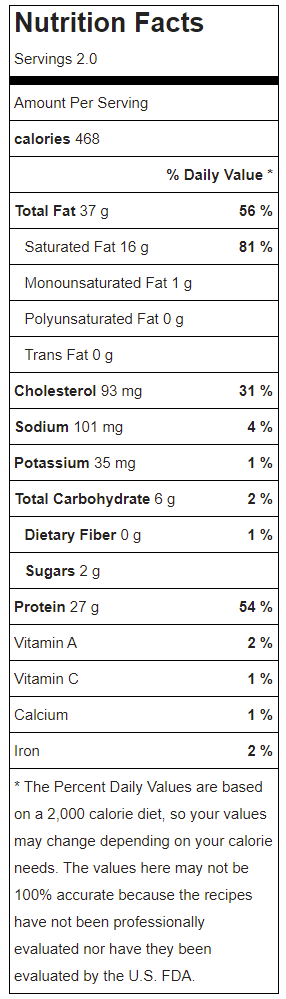
This recipe will create four good sized halves, so enough for two burgers. Be aware that as the ingredients are high in fat they will be quite rich and very filling. One burger should be enough, especially if you are adding extras such as chilli and cheese.
So to wrap up here, this may seem like quite the effort for just a simple burger but don’t be put off. I find this to be quite a pleasing and fun recipe to make as it doesn’t require a large amount of concentration, is relatively quick to do, and makes you feel as though you have really achieved something once its all put together.
As I said earlier, this is part one of a three part series where I will be showing you how to create the burger in the above pictures. So please stay tuned, in the next post I will be showing you how to make a really nice, quick and tasty chili to add to your burger, or just to enjoy on its own.
Thanks for reading!
Keto Target Challenge 2021

🏆🏆 Join me and SmartEats on the Keto Challenge 2021 🏆🏆
This weekend I managed to put on 4lbs in weight. As many lockdown rules have now been lifted we decided to go over to the Isle of Wight to see our respective parents.
As you can imagine, parents being parent filled us full of cake and everything non-keto. So instead of seeing this as a negative, decided to challenge myself to lose all 4lb by Friday.
So, I challenge you guys. My target is 4lb, what is yours. why not put it in the comments and we see if we can all hit our targets for the week.
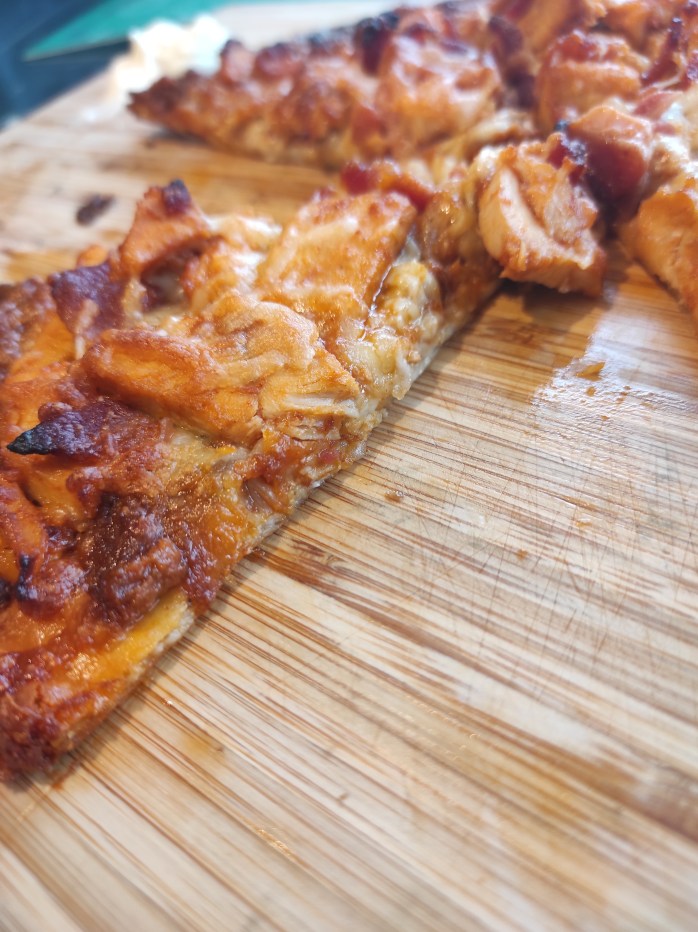
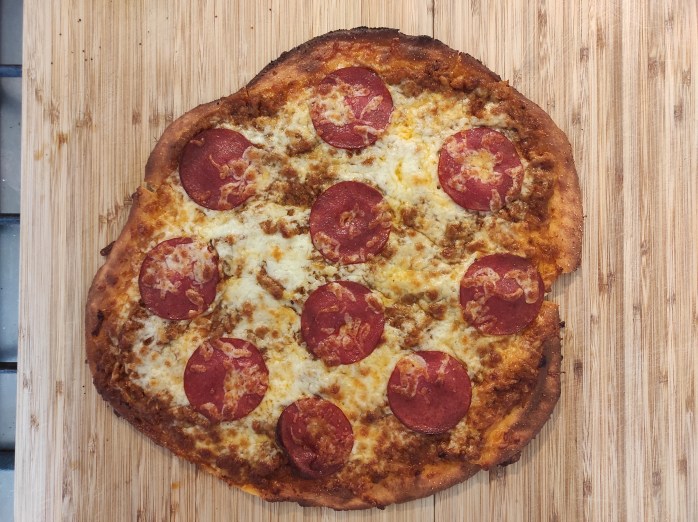
Pizza Base with Coconut Fathead Bread

I love a good pizza, don’t we all, but being on a low carb keto style diet kind of rules out anything made of dough, or so I thought. It was about midway through my low carb journey that I got introduced to Fathead Bread and it changed everything. Not only is it low carb and high fat, everything you’re looking for on a keto style diet, but it also tastes amazing.

If you don’t already know, Fathead bread is a wonderfully chewy and cheesy dough that is super easy to prepare. No need for all that needing and messy flour everywhere, just whack it in a bowl, mix it up and pop it in the oven. As simple as that.
So there is only one pitfall that I have found with Fathead Bread and that is that the ingredients, moreover the ease of finding and the price of the ingredients. Your standard Fathead Bread is made with almond flour. Don’t get me wrong, the taste is amazing and the texture is perfect, the price however is a little on the high side. So this got me thinking of an alternative flour that I could use that was more accessible and cheaper. Enter in coconut flour.
Now you might not think that the flavour of coconut would go with a pizza, but when you consider all the stuff you add to a pizza, it becomes quite easy to mask. You will never completely remove the flavour, but you can definitely reduce it to a point where it’s no longer an issue and in some cases, such as Ham & Pinaple pizza, you may even find it compliments the flavour. Eather way, this makes a delicious pizza dough and a superb alternative to the usual high carb doughs.
Ingredients
| Hard Mozzarella Cheese | 220g |
| Full Fat Cream Cheese | 100g |
| NKD Coconut Flour (Buy here) | 45g |
| NKD Psyllium Husk (Buy here) | 1 tsp |
| Medium Eggs | 2 |
| Baking Powder | 0.5 tsp |
| Salt | 0.25 tsp |
| Cider Vinegar | 1 tsp |
| Garlic Granules | 1 tsp |
Method
- set the oven to 180c fan
- In a medium-sized bowl add the Mozerella and Cream Cheese and pop it in the microwave for 1-2 mins, stirring about halfway through, until completely melted.
- Once removed from the microwave mix well until the cheeses are combined.
- Beat the two eggs until well mixed
- Add all the dry ingredients followed by the eggs and cider vinegar then mix to form a dough.
- Once a dough starts to form, you can get your hands in and manually combine anything that’s not fully mixed in, or just keep mixing with a spoon.
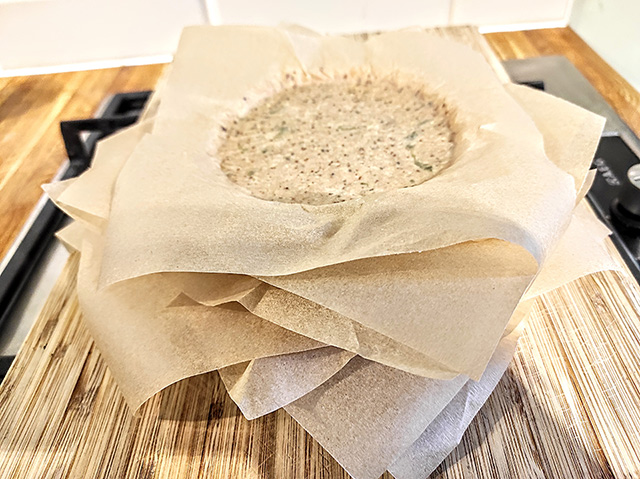
- Cut out two large sheets of baking parchment and place the dough in the middle of one of the sheets.
- Place the other sheet on top and lightly flatten it out the dough into a rough circle.
- With a rolling pin roll out the dough, still sandwiched between the two sheets of parchment, until it’s about the thickness of a pound coin (you can adjust this according to how you prefer your pizza base, but remember that the dough will rise slightly)
- Pop the sandwiched dough in the oven for about 5-7 mins or until you can remove the top sheet of parchment. You don’t want it to be cooked through at this stage as we want to remove the top sheet of parchment allowing the dough to rise.
- With a fork, pierce the centre of the dough several times to prevent it from ballooning in the middle and pop it back into the oven for another 10 mins until it starts to brown slightly. Again, we don’t want it fully cooked yet as we need to put our topping on.
- Remove the pizza base from the oven and liberally spread your Marinara Sauce (I have a great recipe here for this) over the pizza base followed by a liberal showering of mozzarella cheese and any other toppings you choose.
- Place the pizza back in the oven until the cheese is melted and the sides of the pizza are golden brown.


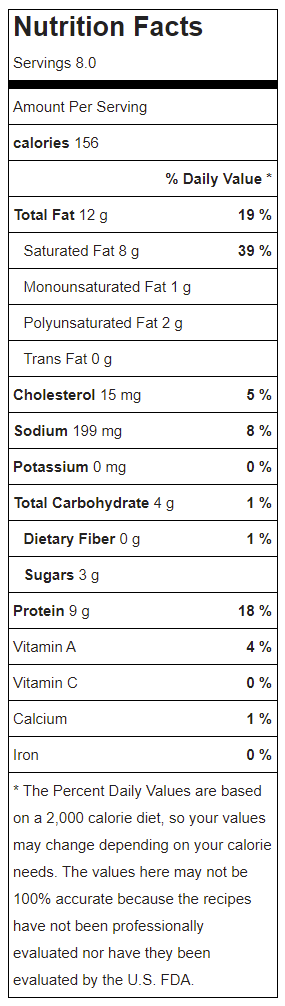
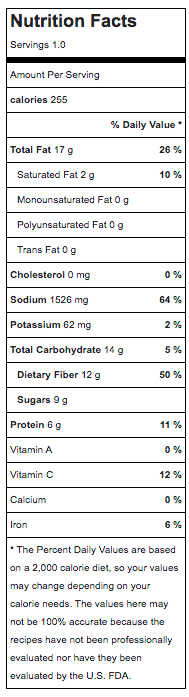
The nutritional values I have added here are just for the Fathead Bread itself. I chose not to add the topping as I figured this was more of a personal preference. I have also done an alternative Almond Fathead Bread recipe for Fathead Thins here. This uses almond flour instead, just in case you aren’t too keen on using coconut flour. All you need to do is replace the additional Cheddar Cheese in that recipe with Mozerella and your good to go.
This is a really versatile dough that can also be used for many other applications. I intend to try it out for quiche and sausage rolls. Give it a go yourself and play with the recipe and its applications. I would love to hear from you guys so please pop me a comment or a like if you find any other uses or just want to say hi.
Enjoy and stay safe 😉
Low Carb Marinara Sauce

There is a story to this recipe, and it’s to do with my wife. Both my wife and I have been following the low card, keto lifestyle for some time now. We both have our target weight we want to hit, however, I started to diet quite a ways before her, and she had a little more to lose than me (sorry honey).
We both have a treat in mind for when we get to our target weight, mine is anything pastry related, mostly brioche, while hers is pizza. So this is how I came to this recipe. I wanted to give her the pizza she so desired but without having to pay the carb price of a Domino’s.
After a little digging around and some tinkering with various recipes I came up with my own version Marinara Sauce, a precursor you might say to fulfilling my wife’s dream of pizza without blasting her carb count in the first bite.
So here it is, my low carb keto friendly Marinara Sauce. It takes no time at all to put together and is a fantastic base for not just pizza but also pasta, spaghetti, mozzarella sticks and a whole host of other dishes. With only six ingredients this is a must for any low carb or keto cookbook.
| White Onion | 100g |
| Fresh Thyme | 5g |
| Fresh Basil | 5g |
| Fresh Parsley | 5g |
| Jar of Sun Dried Tomatoes in Olive Oil | 140g jar |
| Passata | 5 tbsp |

Recent Comments